QVC Spring/Summer 2014 Press Event

Hey everyone! The other day I went to London, to work on something awesome for Clothes Show Live TV, and I thought whilst I was there I may as well pop along to the QVC Spring/Summer 2014 Press Event, and I'm so glad I did. There was so many beautiful things, and I got a gorgeous hand massage from Gatineau. I also got to eat some amazing cakes, and I may have had a few sneaky Thorntons fudges. I definitely feel that it would have been worth going even if I hadn't already been in London for the day. Unfortunately I completely forgot to bring my camera, so all the photos I have are from my phone, hopefully it wont be too noticeable! 


The event was set out in a gorgeous house in central London. From what I overheard it isn't actually someone's house, but nevertheless it was still gorgeous. I did of course head straight for the nail varnish/beauty area (after first going the wrong direction and ending up with the gardening equipment!)


There was an amazing selection of handbags and clothes upstairs alongside the beauty products, and just to the left of this was where I got my fabulous hand massage from Gatineau (this was definitely the best floor)


There was also a fab selection of home decorations, which I may well get my hands on for my new flat next year!


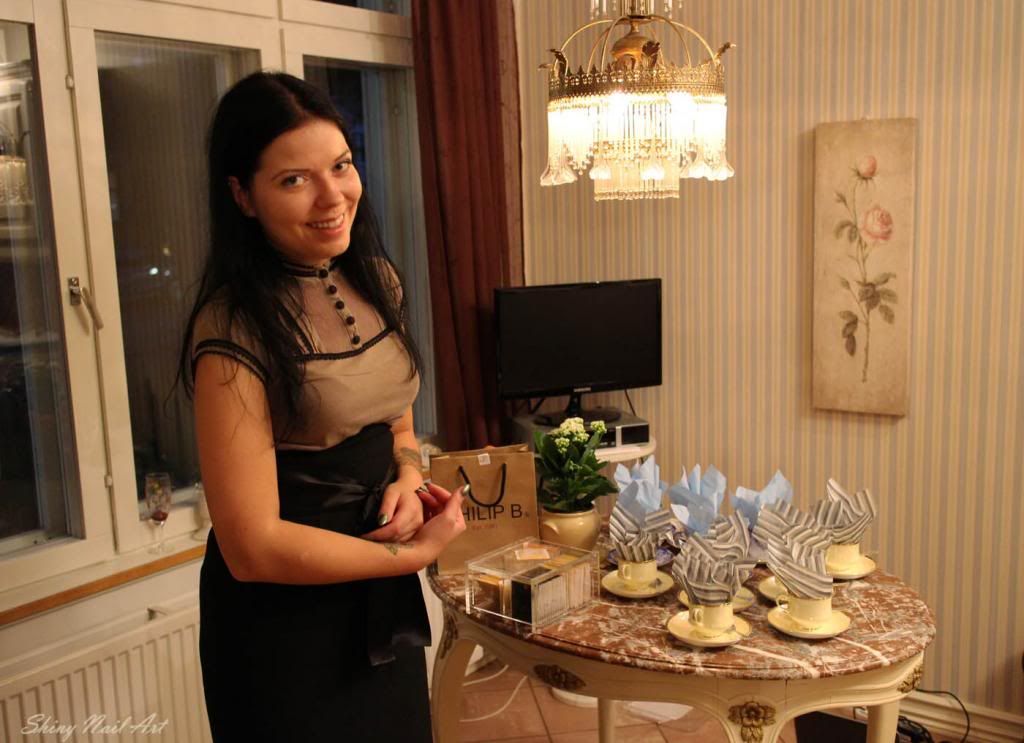
Look how beautiful the venue was! I definitely wish I had that window


There was also an amazing selection of cakes and biscuits. By this point in the day I hadn't eaten for over 8 hours, so I may have scoffed one of the cakes ... or two ... and some fudge. So worth it!


At the end of the event we were given an incredibly generous goody bag (which unfortunately I didn't manage to get a very good shot of before I devoured the marshmallows!), and I couldn't wait to unpack it. I got some very odd looks in Pizza Express emptying a bag of cosmetics onto the seat beside me, no regrets.

Do you see anything that catches your eye? There's definitely a few nail varnishes I have my eye on, just in case I 'need' some more.

Don't forget to enter my giveaway if you haven't already!
Alice

0 comments:

Hämeenlinnan blogimiitti


Nyt loppuvuodesta on tullut käytyä jos jonkin moisissa häppinengeissä. Kaikki erittäin kivoja ja mukavia tapahtumia. :) Aion rustata niistä tänne blogiinkin pian, vaikka sitten enemmän vain kuvien merkeissä, kun nyt ei tunnu aika riittävän pitkiin sepostuksiin. Aloitan tästä Sonian, Tyttö ilman helmikorvakorua, järkkäämästä kauneusbloggaajien tapaamisesta aikas idyllisissä puitteissa Hämeenlinnassa. Tässäkin postauksessa paaaaljon kuvia olkaa hyvä. :D 

Sonian kultainen äiti oli luovuttanut todella kauniin asuntonsa päiväksi käyttöömme ja tehnyt meille jopa kotitekoista leipää, piirakkaa ja muuta pientä hiukopalaa! Ihastuin asuntoon ja sisustukseen ihan täysillä ja innostuin kuvaamaan suunnilleen kaikkea! Joka paikassa oli pieniä nättejä yksityiskohtia ja asunnon naisellinen ja vaaleanpunainen tyyli oli aivan hurmaava. ♥ Katsokaa nyt näitä kuvia vaikka! 


Entisen kemikalio-kauneushoitolan omistajan portaikkoa koristavat jättimäiset ja suuremmoiset hajuvesipullot! 
Ihanat yksityskohdat ja täydellisyys jatkuivat täten tietenkin myös kylpyhuoneessa. ♥ Oikeasti niin toivon, että minulla on joskus mahdollisuus sisustaa kotini yhtä kauniisti...


Sää suosi ja olimme lähellä nättiä seutua, joten lähdimme sulattelemaan herkkuja pienelle iltapäiväkävelylle. On tuo Hämeenlinna kyllä kaunis paikka. Innostuin taas vähän kuvailemaan, tuolloin minulla lainassa olleella, Canon EOS M -kamerallani. :D


Sinini :D 


Ihana emäntämme Sonia ♥


Kävelyltä palatessa ilta alkoi jo hämärtyä ja Sonia tarjoili meille kahvia ja teetä. Pelleiltiin vähän lisää Sininin kanssa ja keksittiin mielenkiintoisia kuvauskohteita :D Okei, Sonia ehdotti tuota peiliä ja kyllähän siitä aika hauskoja otoksia sai. :)


Duroyn edustaja kävi esittelemessä meille suosikkituotteensa ja kertoili vähän Duroyn historiasta ja uusista tuulista. Saimme myös kokeilla Duroyn ripsitupsuja, joita Sensaistin Mari sitten ystävällisesti (ja ammattitaitoisesti) kiinnitti kaunistamaan silmiämme. :) Kuvassa Karoliina Marin ripsikäsittelyssä. ^_^


Aivan illan loppumetreillä meitä tuli tapaamaan toinenkin vieras. Tämä hiusalan ammattilainen valitsi, jättimäisestä aarrelaatikostaan, jokaiselle pari omalle hiustyypille sopivaa tuotetta testattavaksi! Jee :D Niistä ja vähän muista miitistä saaduista tuotteista lisää seuraavassa postauksessa! :) Kiitos vielä kerran Sonialle ja Sonian äidille kotinsa lainaamisesta! Oli kiva taas tavata kanssabloggaajia, meillä oli tosi mukava puheensorinan täytteinen ilta. ^_^

0 comments:

Dot's Make Up Wipes Review

I know, I know, this post is late! But yesterday was just... Bleh. While going to get my driving permit - Yes, late to the party I know, but I just got my first car, so better late than never. - I discovered I was blind when I failed the eye test. Of course I knew my vision wasn't the best, but after going to get some glasses, I learned that I am quite visually impaired! Weirdly enough, my right eye is worse than my left eye. But now I have some glasses, and my permit. So it was a long day, but a good one too.
Anyway! Now I am here, and it is time to review a product I bought last month. I waited to review it so I could see the long term effects, and give a more comprehensive review.

Dot's makeup wipes - $3
Before I start, I want to say that while I work for the Dot's company, I am still giving my full, honest, opinions. This is new to my store, and everyone there was really curious on how well they worked. So, knowing that I have a blog, someone suggested I review them. I was not given them, I bought them with my own money. Hopefully you won't think I'm biased.

My store sells these in 25 sheet packets. While that doesn't seem like a lot, at only $3 per pack, I think that's a pretty good price. I've been pricing makeup wipes at my local drugstore for a while, but could never get past the price tags. $15 for wet wipes seems a bit steep to me...
I wanted to try these wipes out not just because of the price, but also because I usually work the closing shift, and when I get home I've been known to sleep with my makeup still on. GASP! I know, that's really bad, but I'm tired! So I figured I would test these wipes out, and simultaneously save my poor skin.

Now for my opinions!
I like the packaging, I'm a sucker for zebra. I also like the size, it's small enough to keep on my bedside table for when I'm feeling lazy. I also like that it's resealable, and means it. The cover actually stays closed, even after being opened countless times.
The wipes themselves are pretty scentless, which I prefer. I hate overly fragranced products. I don't want my face to smell like I fell into a vat of perfume.
The true test was obviously the actual make up removal.While the wipes had a bit of trouble removing my layers of mascara, they did remove my foundation, concealer, and all the other products I put on my face on a daily basis. My face felt clean, and my skin didn't get that tight feeling some products leave behind.
One thing I did notice though, was that after a while I started getting a couple dry patches by my chin. I already have dry skin, and this product is a tad drying. But most products are to me. Very rarely can I find a product that isn't drying.

Ingredients:
Water, glycerin, aloe vera gel, vitamin E acetate, benzalkonium chloride, fragrance, bronopol.
Even though ingredient list says fragrance, I really couldn't smell anything, which works for me!

Overall, I like the price, the packaging, and the results. I would just be careful if you have dry skin like me, and not use them every night. Also make sure to apply some moisturizer after use.
Because of my dry skin, I try to only use them after work, or if I'm not feeling well and the trip to my bathroom sink sounds like a trip to Mordor.

Thanks for reading! I hoped you liked my latest review, to check out my previous reviews click here.
- xo Brittany

Follow on Bloglovin

0 comments:

The Rise Of Nail Art: Article For RetroCULT Magazine


Hi! Today I want to share something a little different with my lovely readers. You'll be well aware that one of my main passions is nail art (duh), but you might not know that I'm also a very keen writer. A few months ago, when I was trawling job sites on the hunt for the 'perfect' role, I came across an ad calling for writers to contribute to an up-and-coming magazine. I jumped on it immediately, and began creating articles to submit to the editor. Fortunately, he liked my ideas and decided to include two of my stories in Issue 1 of RetroCULT magazine.

RetroCULT focuses on popular culture from the '50s until present day. There's something for everyone within its pages, and along with stories about film, literature, fashion and sport, the first issue also includes my article...

The Rise Of Nail Art

The term 'Art' inspires visions of illustrious masterpieces: vast Impressionist canvases, intricate portraits of the bourgeois, colossal marble sculptures, all safeguarded by chrome and velvet barriers within glorious rooms of paneled mahogany, and complemented by golden plaques displaying the exotic monikers of da Vinci, Rembrandt, and Michelangelo. The sheer scale of a piece is an immediate indication of prestige. Recently, however, a new form has begun to subvert the mantra of 'the bigger the better', taking centre stage on the tiny canvases of fingertips: nail art.
Many consider nail art a recent trend. Famous fashionistas are often caught flashing their bejeweled talons, and celebrities regularly complement a quirky dress sense with bold, bright nail choices. The recent media frenzy regarding international fashion weeks has also continued to push nail art into the limelight. Along with the excitement regarding legendary designers, willowy models, and audiences bursting with superstars, the additional styling and accessories, including nail art, is persistently photographed, featured and praised.
Historians assume that nail decoration originated from the ancient worlds of India, Egypt and China. While the formers dyed nails with henna, thus turning them deep shades of red and brown, the Chinese combined a variety of natural ingredients with rose petals, and dipped their finger nails into the formula, turning them pretty shades of pink.
As with many ancient traditions, social rank was regularly reflected in nail embellishments. The classic red manicure dominated the time of Cleopatra, whose crimson nails reflected her position as pharaoh. Unlike the royalty of China's Chou Dynasty, however, who allowed other upper class women to imitate their choice of metallic nails, Ancient Egypt rulings forbade anyone to mimic Cleopatra's rust red manicure. The crime of copying was punishable by death.
Throughout time, advancements in technology have meant that both nail care and nail art improved. Tools were developed to buff, file and shape, and the creation of automobile paint inspired the first modern nail polish. Nowadays, professional nail salons line the high street, and customers are bestowed with impeccable manicures in a matter of minutes.
Each decade has seen the rise of its own signature nails: the post-war generation channeled Hollywood glamour in their glossy red manicures, whilst the '60s and '70s presented a penchant for nudes, pastels and earthy tones. In the 1980s, black talons matched the fashion statements of Goth and Punk, while the ravers' neon manicures coordinated with their miniskirts and legwarmers.
Now, the possibilities of nail art are endless. Striping tape, dotting tools and miniscule paintbrushes are easily accessible to pros and amateurs alike, and ensure precise, neat manicures for a purse-friendly price. Stamping equipment and transfers make for easy, professional-looking decoration, while an abundance of holographic nail polishes, glitters and studs mean your nails will stand out from the crowd. Online, your search engine is sure to find a tutorial for the more complex technique, and provide you with wealth of manicures to inspire.
The ultimate creative outlet, nail art allows your imagination to run wild, hones your skills, and leaves you with fingertips that are sure to impress. What's more, while Michelangelo would never dare lift David, and da Vinci would surely struggle to carry the Mona Lisa around, the form of nail art is effortlessly exhibited.
You can take a proper look at RetroCULT here. My stories are on pages 52 and 64 (the second is 'Student Talk', a tongue-in-cheek article about making friends when you're at university), but be sure to have a gander at the rest of the content, because a lot of fantastic writers are showcased. If you like what you see, be sure to share RetroCULT amongst your friends. It really is a wonderful magazine, and I feel so lucky to be involved!

0 comments:

Winter Bouquet Nail Art


Hi everyone! First of all, I want to say a BIG thank you to all of my lovely readers - last weekend my blog hit an amazing 20,000 views, which I am super excited about. So thanks to everyone who has visited Little Tip Off over the past 8 months, you are absolute angels. I hope you continue to enjoy taking a peek at my nail art endeavours - I plan to keep on blogging for a very long time! Anyway, gushiness aside, today's manicure is my first attempt at something 'wintery'. I am a bit grinchy (it's my new favourite word) when it comes to Christmas. Don't get me wrong, I absolutely adore the giving and receiving of gifts, the visiting family and friends and, of course, the food and drink. But in terms of putting up a tree, wrapping presents and donning a reindeer jumper, I try not to think about it until the 1st December strikes. Thus, I have vowed to avoid overtly Christmassy nail art until next week at least! However, I can't see anything wrong with being slightly seasonal now the big day approaches, so when a desire for a floral mani struck, I decided to inject a bit of festivity into it and create a sparkly winter bouquet design.

The equipment:

Sinful Colors 'Snow Me White'
Sinful Colors 'Pistache'
OPI 'In The Cable Car-Pool Lane'
OPI 'Chic From Ears To Tail'
OPI 'Innie Minnie Mightie Bow'
OPI 'Stand In Lime For Days'
 Barry M 'Shocking Pink'
W7 'Purple'
No. 7 'Totally Teal'
No. 7 'Hot To Trot'
No. 7 'Gold Glitter Top Coat'
Models Own black nail art pen
Models Own white nail art pen
Essie 'Good To Go'
Medium nail art paintbrush
Small nail art paintbrush


I used 'Snow Me White' as a base, as I wanted there to be a high contrast with the flower design. Once dry, I began to add the base block colours using a medium sized paintbrush. I added large petal shapes in 'Chic From Ears To Tail', and the bases for roses in the same shade of pink, along with 'Purple'. I then used 'Pistache' and 'Stand In Lime For Days', which are pastel and lime green respectively, to add the bases for leaves. 


When I was happy with the base design, I started to add details with my tiny paintbrush. For the large pink petals, I used 'Innie Minnie Mightie Bow', which is a rich red shade. On the pink roses, I added details using Barry M 'Shocking Pink', and then turned to OPI again for the details on the purple roses. No. 7 'Totally Teal' was used for the leaf details, and when this was all complete, I decided to add some little berries into the gaps.


My Models Own nail art pens helped to achieve even more detail and contrast. I built up the shapes of the flowers in both black and white, and also used white to highlight the berries. Finally, I used 'Hot To Trot' and 'Gold Glitter Top Coat' in the areas that looked a little bit bare. The addition of gold sparkles really added to this design, and transformed it from a standard floral design into a wintery bouquet. What do you think? Let me know!

0 comments:

Tutorial Tuesday: Saran Wrap Nails

Hey everyone! Super quick post, it's late and I have to be up early to go to London tomorrow. I'm off to do something exciting, which you shall see very soon. Today's tutorial isn't a very original one, in fact I think the idea originated from Nailed It, but hopefully you will appreciate it nonetheless. I have a load of christmas tutorials coming your way, but they wont start until December, I'm a strict scrooge!

Step 1: Paint your nails with a base colour, I used Barry M – Dragon Fruit
Step 2: Once your base layer is dry paint a layer of a contrasting colour over the top, (I used Barry M - Blueberry Ice-Cream) do your nails one at a time with this and the next step - and be quick
Step 3: Roll up some cling film in to a ball and dab it onto the wet blue nail varnish
Step 4: Finish off with a topcoat (I use Seche Vite) to seal in your design, and you're done!

What do you think? Let me know in the comments!
Alice

P.S Have you entered my giveaway yet?

0 comments:

Disney Nail Art: Pocahontas


Hi everyone! Today I am super duper excited about my manicure, for two reasons. First, it's the third instalment of the Polish Party's monthly collaboration, with the theme of Disney. Secondly, this is my very first attempt at portrait nail art, which is something I've always been very scared of. I follow several amazing nail artists on Instagram who regularly post the most incredible, detailed portraits of characters. I've always envied their abilities to make a person look 'real' with the use of nail polish and a paint brush, and although I'm no where near their standards yet, I feel like my Pocahontas design is a few steps closer to their amazingness! 

The equipment:

Barry M Limited Edition 'Yellow'
Barry M 'Shocking Pink'
Barry M 'Papaya'
Barry M 'Greenberry'
Barry M 'Grey'
Models Own 'Blueberry Muffin'
Models Own 'Feeling Blue'
Butter London 'Molly Coddled'
W7 'Purple'
Sinful Colors 'Black On Black'
Sinful Colors 'Snow Me White'
Seventeen 'Forever'
e.l.f. 'Mango Madness'
Models Own black nail art pen
Essie 'Good To Go'
Medium nail art paint brush
Fine nail art paint brush
Cotton buds
Acetone


Yep, this mani required A LOT of equipment. To start with, I applied my bases. I applied two coats of Barry M's bright yellow to my ring finger and thumb nails, and then used 'Blueberry Muffin' for my other nails. Once dry, I followed The Nailasaurus's Nimbus Nail Art Tutorial for my blue nails. After dipping a cotton bud in acetone, I used 'Feeling Blue' and 'Molly Coddled' to form a pretty, cloudy base. When I was happy with the result, I topped it off with 'Good To Go', as I wanted my nails to be totally dry before adding the rest of the details.


My yellow nails were the bases for the portraits. I've tried raccoon nail art before, so felt a bit more confident about painting Meeko. I used white, grey and black polish, and mixed them together to achieve a few different shades. I used a medium paint brush for the base colours, and a much finer one for all of the tiny details. Unfortunately, the brightness of the polish beneath seemed to tinge the design yellow, so I probably should have used a paler colour for these bases. Never mind!


Pocahontas was painted using 'Forever', 'Black On Black' and 'Snow Me White'. Again, I mixed the colours for different sections. I used 'Mango Madness' for her lips (that's also the colour of Meeko's mouth). I then added her necklace using 'Greenberry'. Finally, I added a combination of leaves, dots and dashes for the 'wind'. Everything was then topped off with 'Good To Go'. What do you think? 


Make sure you check out the rest of the Polish Party girls' Disney manicures!


0 comments:

You're a Wizard, Harry

Yes, I was inspired by the holy grail for book nerds like me, Harry Potter!
I have wanted to do a Harry Potter themed design for quite some time, so I figured I would finally give it a go. I have been an avid fan since I started reading the novels when I was a preteen, and I have re-read them multiple times. I've also seen all the movies - Though, I prefer the books.- , and I own all the corresponding video games. Told you I was a fan!
I just love the story, and the characters. My favorite character would have to be either Sirius Black, or Remus Lupin. Though, my favorite animal character has to be Hedwig. I was so mad when Hedwig died! Spoiler! :p


For my design I went with a skittle manicure, which is a different corresponding design on each nail.
(Click here to see my last skittle manicure.)
I decided to theme my design after the four houses of Hogwarts; Slytherin, Ravenclaw, Gryffindor, and Hufflepuff. And yes, I know I have five fingers and only four designs. So I honored my favorite feathered character, Hedwig.

For the houses, I looked up the Hogwarts crest and based my patterns accordingly, and obviously I used each houses signature colors.

For all of my nails, I used a base of white polish to help coverage.
To represent Slytherin on my thumbs, I used four coats -It's very thin.- of Sinful Colors Out of This World, then I applied some striping tape down the middle of my nail, painted two coats of Revlon Spanish Moss, then quickly removed the tape.
For Ravenclaw, I applied two coats of NYC Sidewalkers on my index fingers. Then I applied striping tape to create the wide band. After I applied two coats of Pure Ice French Kiss, I quickly removed the tape.
For the popular Gryffindor house, I applied three coats of Sally Hansen Gilty Pleasure on my middle finger nails, then marked off a square at the top of my nail using striping tape. I used a detailing nail art brush and painted in the square using Sinful Colors Ruby Ruby, and, again, quickly removed the tape. For the bottom square, I used the same brush and free-handed it.
I created Hedwig using NYC Black Lace Creme, and NYC French White Tip. I learned to create the owl a few years back from an awesome tutorial by Cutepolish. I think the tutorial is still on Youtube if you want to check it out. I would recommend it, and all of her videos. She makes the most amazing, adorable, designs.
Hufflepuff was the most time consuming design. To create it I applied a base of Butter London Cheeky Chops - It's almost gone!-, then applied striping tape diagonally across my nail, applied two coats of NYC Black Lace Creme, then removed the tape.
To finish off all the designs, I applied a coat of Relvon Quick Dry top coat.


Close up of Hedwig.
Close up of Slytherin House colors. Sorry about my nail, it had a bad break. :(
This design was so fun to make, and reminded me just how much I love the Harry Potter story. It may be time to break out the novels again...

Thank you for reading! I hope you enjoyed this design as much as I did. To check out my previous designs click here.
- xo Brittany

Who is your favorite character? Which house would you want the sorting hat to pick for you? Let me know in the comments! While Gryffindor is an obvious choice, I think I would pick Ravenclaw.

Follow on Bloglovin

0 comments: