Hey everyone! Today's tutorial tuesday is going to be a little different. From now on, the steps for
every other tutorial tuesday will be available to view on
Divine Caroline, but I will only be posting the finished design look on here. The first tutorial I've done for DC is this cute heart design, which you can find on DC
here. I knew I wanted to do some form of pattern within hearts, and I originally thought I'd do a tutorial for
this design I did a while ago but once I started I realised I wanted to go for something a bit more cutesy.
Don't forget to go check out the steps for this design
HERE
What do you think? Let me know in the comments!
Alice
Hey everyone! I totally forgot to post last night, I spent most of my night doing nails, not just my own, and didn't have the energy to post when I finally remembered at 1am. So here I am today, which means you'll probably get 3 posts in a row this week. (Surely that's a bonus?)
So today's post is a review of some awesome
6mm heart shaped studs that I recieved from
KKcentreHK. I decided to create a valentines design with them (duh) but I probably should have chosen a different colour for the flowers because they're not very clear as you can see!
I actually really liked these studs, they're not very practical as they dont lay completely flat, but for the many of you who wear bows and studs and whatever else on your nails I really dont think that will be in an issue. I'd love it if they were miniscule but even at the size they are I cant wait to use them again.
They come in a small packet with around 40-50 studs inside. But that's actually a lot considering that you can easily reuse these multiple times. The base for these nails was OPI - Gargantuan Green Grape, and I used OPI - My Boyfriend Scales Walls for the 'white' and Essie - Beyond Cozy for the glitter.
I know a lot of you come here for nail inspiration, so for those of you who anxiously waiting the arrival of your 6mm heart studs that you just realised you wanted, here is an alternative design for valentines day:
The studs sell
here for $5, which I think is actually really good value for money. especially when you can use my code 'ONTRTA' to get 10% off!
What do you think? Will you be buying these studs? And which manicure do you prefer? Let me know in the comments!
Alice
Tomorrow is also the last day to enter my
GIVEAWAY so dont forget!
This product was sent to me for review but any opinions included are entirely my own and were not affected in any way by anyone else
Hey everyone! I'm very excited to show you today's post as I'm super proud of it. I know I should probably be modest but I love Rob Ryan and I'm so happy to have his work on my nails finally! If you dont know who Rob Ryan is I suggest you do some googling, he's a British artist who does lovely paper cut outs and screenprints which have been transferred onto many things. And you can find his blog
here. This year for christmas I got a mug, a calender and a money box. And today's design is based off the money box, which you can see below, but I adapted the text to be more valentines-ey.
I'm really happy with how this design came out, I probably chose a green that was a tad too bright but even so I really think you can tell that they're based on his style. He does a lot of designs with birds and this specific text.
I used a base of OPI - My Boyfriend Scales Walls, and then I added OPI - Greenwich village using a small, cutdown, detailing brush, which I also used for the birds in Barry M - Bright Pink, the birds feathers in white acrylic paint, and the writing in white and black acrylic paint. All topped off with two coats of seche vite.
This picture of the money box was the only one I could find online and I dont feel it shows the colours very well, my nails were pretty accurate to the colours of the money box in reality.
What do you think? Let me know in the comments, I love reading what you have to say!
Alice
Hey everyone! So yesterday you got 2 posts in one day, dont expect that very often because it probably wont happen again haha. Anyway, today's post is yet more valentines day related nails, please tell me when it gets too much because I absolutely love doing hearts and I have a couple more designs planned yet! I also wanted to test out a new technique that I'd heard about, using my new
bottle from
Born Pretty Store.

I know many of you like to use empty used bottles for this technique, but I've always struggled to completely empty them, and for those of you who are out there, and incapable like me, but really want to use the PVA glue technique,
this is for you. The
bottle is pretty similar to a seche vite bottle, with a slightly longer lid. The brush isn't too wide and all round it's quite easy to use. You all know how much I hate glitter just because of the removal, but now I can't get enough of it, seriously GIVE ME ALL THE GLITTER. On that note if anybody wants to buy me a new bottle of Essie - Beyond Cozy I wont say no ;)


So I filled the bottle with PVA, and then applied it to my nails just like normal polish. My lovely friend
Emily advised me to wait 20 minutes, or at least until it was completely clear and dry to touch, so I did. And then I removed it tonight, it was SO easy, I will be using this every time without a doubt. I'm afraid the removal picture is awful quality because my camera is dead and I need to buy some more batteries so my phone shall have to suffice.
Before I show you the removed nails though it's probably best that I actually explain the nails! I used my set of Essie minis from the Winter 2012 collection which includes leading lady, snap happy and beyond cozy, all of which are beautiful, and I also added Barry M - Bright Pink. The base is of course leading lady. I used a small detailing brush for the hearts. These pictures truly don't capture the beauty of leading lady, it's so so beautiful.
As you can see they all removed perfectly and there was absolutely no damage to my nails after at all. If you put PVA on your skin and peel it off (which by the way, is AWESOME, and your childhood probably included doing it at some point) it doesnt damage the skin, and it doesn't damage your nails either. I would 100% recommend this technique, and for those of you who are incapable of cleaning bottles just like me then you can get an empty bottle
here at
Born Pretty Store, and if you use my code
KHL91 then you can get 10% off!
What do you think? Both of the nails and of the technique? Let me know in the comments, I love reading what you have to say.
Alice
And dont forget to enter
my giveaway! If you win you could buy this bottle ;)
This product was sent to me for review but any opinions included are entirely my own and were not affected in any way by anyone else
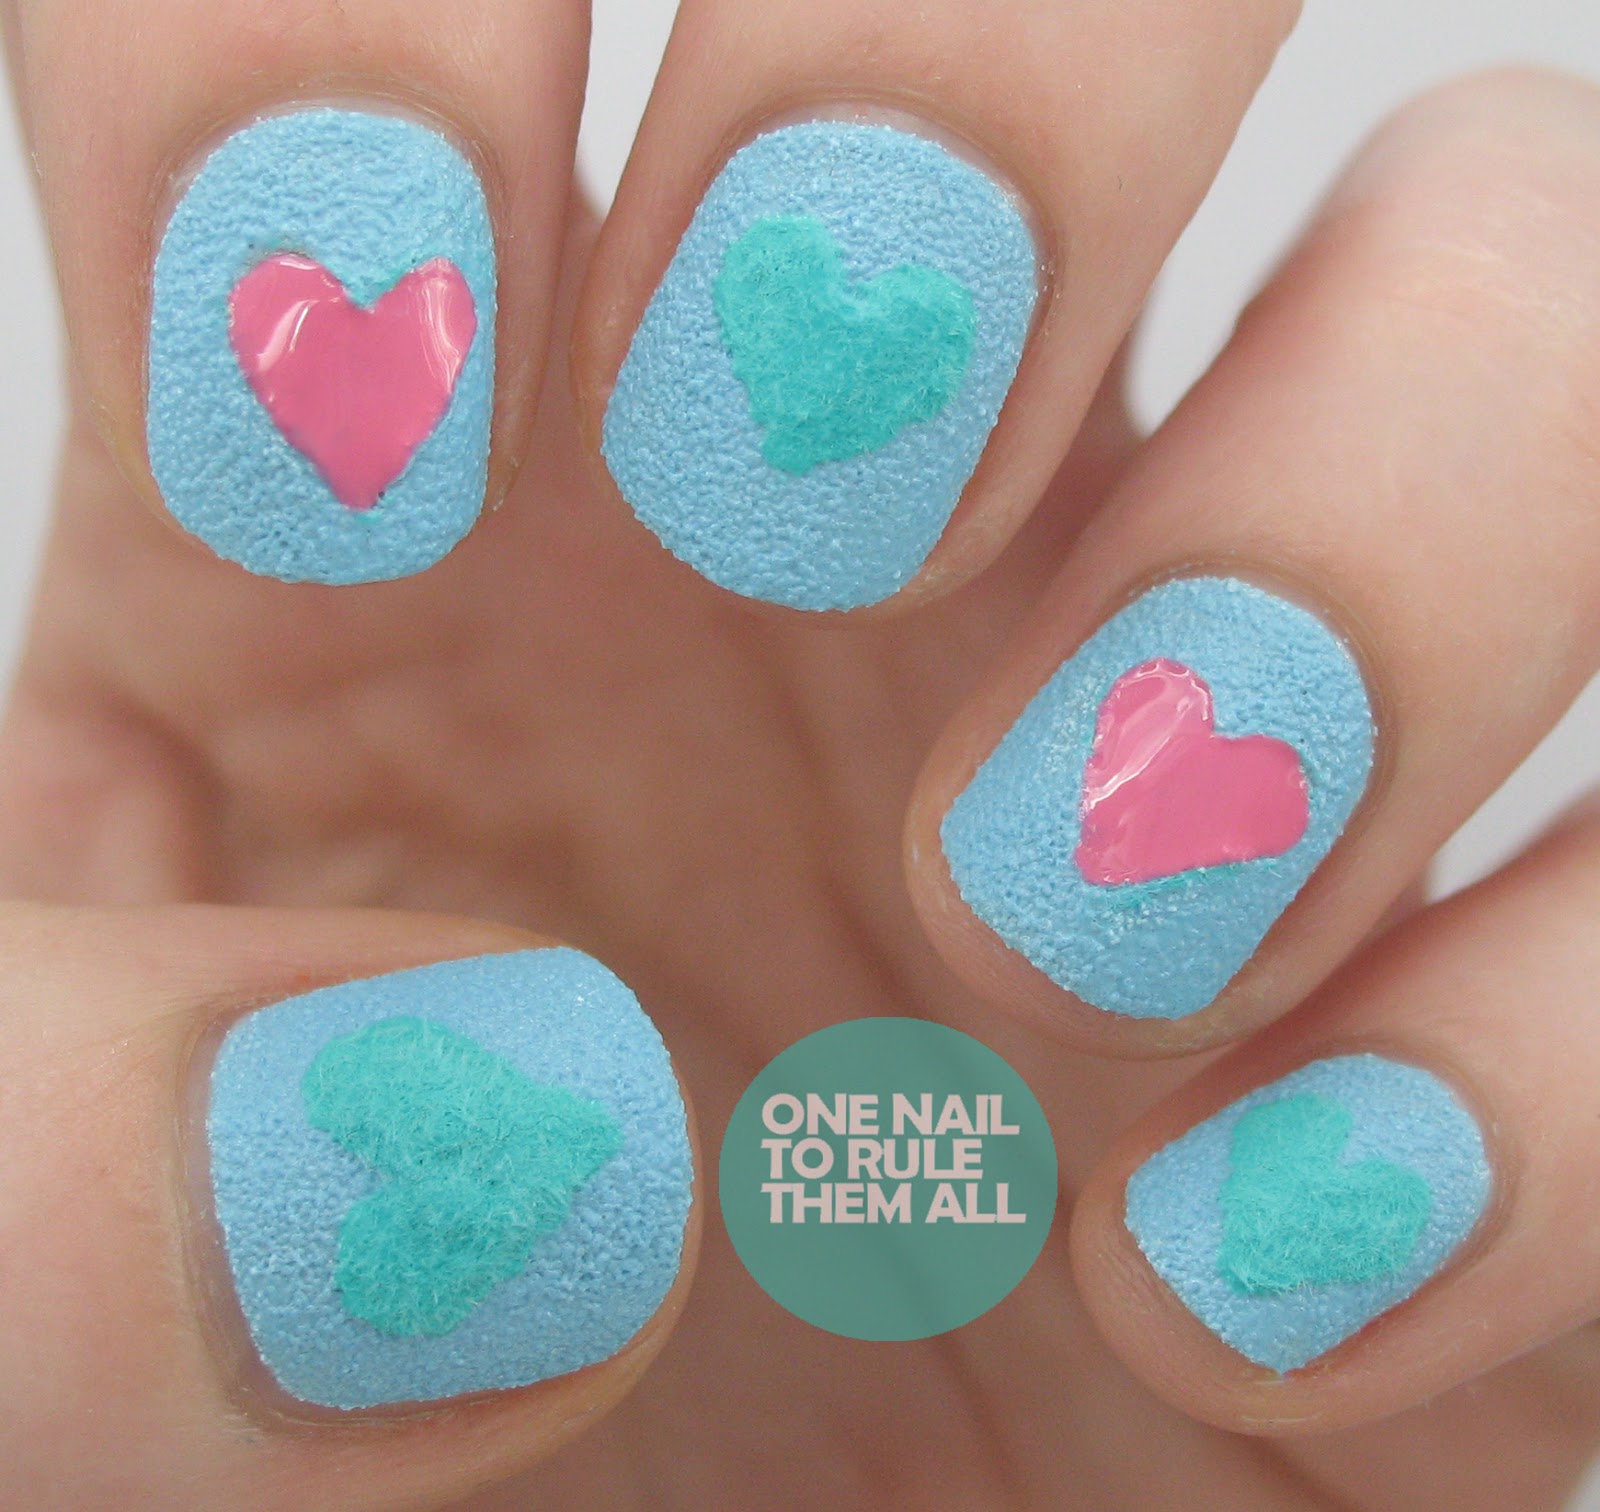
Hey everyone! These were meant to be on schedule last night and it completely failed on me so I'm finally back with some nail art. Although don't get your hopes up too much because they're not that exciting! These nails were just an experiment, I wanted to use
Barry M's textured nail varnish for some nail art, and
Born Pretty Store had also sent me some
flocking powder to review, so I thought it would be a nice experiment to combine the two. I know I promised some nail art using
Lychee, but that shall be coming up in the next few days.
So after applying
Barry M - Atlantic Road, I used a dotting tool to paint on
Barry M - Greenberry with as much polish as possible on the tool, and then I dropped on some
flocking powder by hand (I'd advise using the tweezers, really, I was just having an odd moment - it went EVERYWHERE) and brushed it off using the brush that comes with it after a couple of seconds.
I quite liked the look, but after taking photos I felt that they needed something more, so I scraped (yes, scraped, it wasn't nice) the flocking powder and polish off my ring and pointer fingers as they weren't completely dry, and then I used acetone to clean up in the remaining space, leaving me with 'cut out' hearts, and then I filled it in with Barry M - Shocking Pink. You can see this after the jump otherwise this post will be too long!
I didn't apply any top coat because I didn't want to ruin the 'cut out' look, if you can see what I mean in the pictures.
You can get the flocking powder at
Born Pretty Store along with tweezers and a brush for $7.99
here, which may seem like a lot but you can also get 10% off if you use my code
KHL91 and it's totally worth it for such a unique effect.
What do you think? Which design do you prefer? Let me know in the comments.
Alice
This product was sent to me for review but any opinions included are entirely my own and were not affected in any way by anyone else
Hey everyone! Did you miss me? It's nearly been a week since you
last saw my nails! I actually did these nails last wednesday, but I knew
Emily's post was coming up and I didn't want to leave you with no post this week so here you go.
These nails are one of only two designs I've ever done directly from another artist, you can see the other
here (unless I've forgotten about another one!). I have a folder of screen grabs on my laptop and I was just browsing them, not actually intending to do any nails from them, and this design really stood out to me. It was a screen grab from youtube so I went on the hunt for the original tutorial, but unfortunately it had been deleted, I managed to find a full picture of the nails
here (mine was only a partial screen grab with no thumb) and decided to do my nails based from that. I know my owls aren't anywhere near as good, but nevertheless I still really like them!

I used a base of Models Own - Blooboo, and added tiny white dots using Essie - Blanc and a dotting tool, I then painted the moon in white acrylic paint, and then put a top coat straight over that, it came out pretty bumpy so I added
Essence - Top of the Ice-Stream to give it a creamy tint and to hide any bumps. Then I used a
tiny brush and Models Own - Nude Beige for the brances, a mixture of China Glaze - Gaga for Green and OPI - Dont Mess With OPI for the leaves, and then black acrylic paint for the writing and owls, and red acrylic paint for the hearts. All topped off with 2 coats of Seche Vite.
What do you think? Have I done justice to the original? Let me know in the comments
Alice
Hey everyone, I had my first exam today and I'm feeling relieved that it's over, but I have 2 more to go so we'll see if the optimism continues! Today's post is only going to contain one picture as it's actually from an upcoming tutorial that you'll see around valentines day, but I wanted to use it as a post this week so you weren't left with nothing! I'm not going to give much away now because you'll see soon, but I hope you like them!
What do you think? Let me know in the comments!
Alice




.jpeg)


