Showing posts with label my vampire is buff. Show all posts

Then and Now: Frankenvamp + Tutorial

Hey everyone! I have the last of my 4 halloween tutorials for you today, don't forget to check out the tutorials tab at the top of my blog if you want to see the previous 3! This post is also another Then and Now post just like last week. I was so sad that I had to take these nails off for work, but at least with a blog I'm able to document my designs so I don't feel quite as bad when they have to go. Anyway, the tutorial and the 'now' nails will be after the jump!


The base for these nails was OPI - My Vampire is Buff (quite fitting), and Barry M - Key Lime, the black is acrylic paint, as is the white, and the red is Barry M - Bright Red, all topped off with a coat of Seche Vite


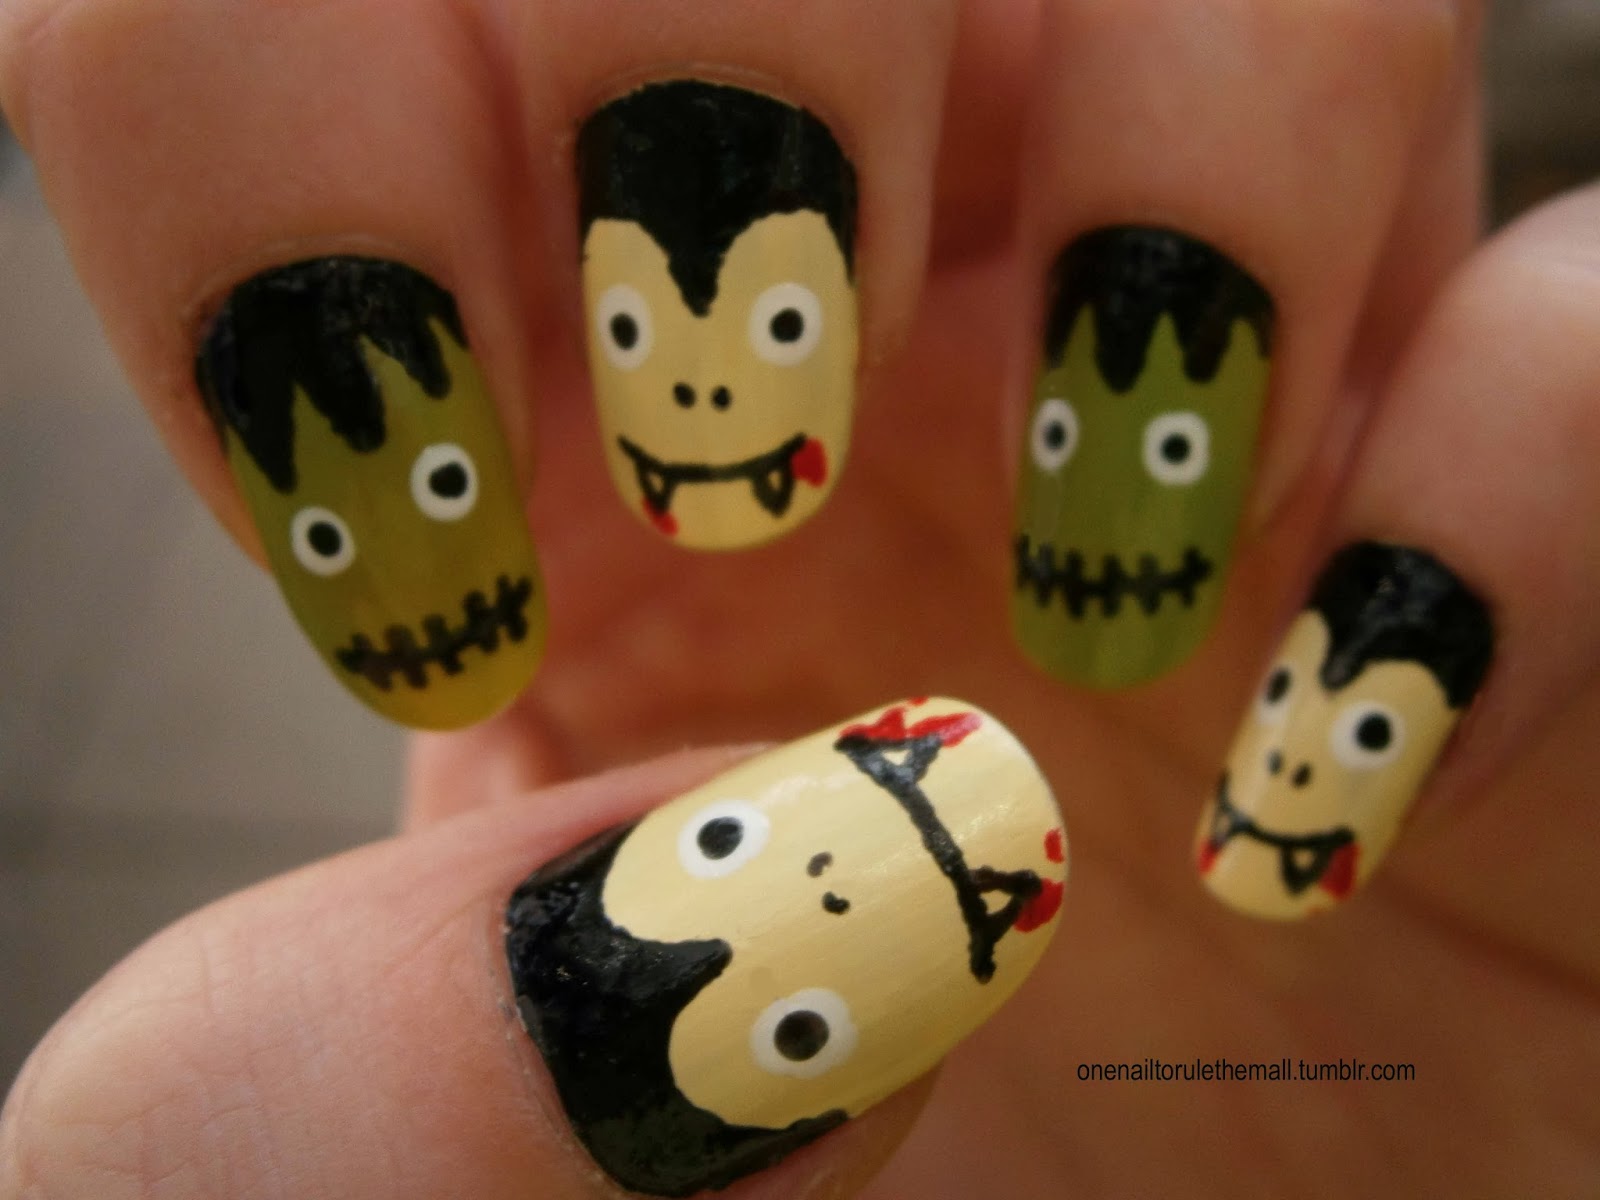

And these were what these looked like 2 years ago, I definitely prefer the Frankenstein nails now, the state of my cuticles, and my use of topcoat! Oh and also definitely my nail shape, what do you think?

Step 1: Paint your nails with your basecoat colours
Step 2: Using a thin brush and black nail polish or acrylic paint, paint on the hairline for both Frankenstein and Dracula, start at the tip of the hair and work your way up to the top to ensure neatness
Step 3: Using a thin brush paint lines for both monster’s mouths
Step 4: Then paint the teeth for Dracula and the lines for Frankenstein’s mouth using the same brush
Step 5: Using a dotting tool or cut down toothpick, paint on the eyes using white acrylic paint or nail varnish. You can also add a bit of blood using red around Dracula’s mouth at this stage
Step 6: Using either a dotting tool, brush or toothpick, paint on the centre of the eyes in black
Step 7: Draw on the noses of the monsters using your chosen tool
Step 8: Finish off with a topcoat to seal in your design and you’re done!

What do you think? Let me know in the comments!
Alice

Then and Now: Pumpkins + Tutorial

Hey everyone! Today's tutorial design is pumpkins, probably the most famous halloween food there is. Although, I'm about to making a shocking confession: I have never actually eaten pumpkin, dun dun dunnnn. The smell puts me off way too much, but every autumn I hear people raving about how good pumpkin is, yet I'm still not quite tempted to try it. Nevertheless, I can enjoy it on my nails, and it's such a simple design to complete so I'm sure you can all enjoy it too! The 'then' nails and the tutorial will be after the jump


For these nails I used a base of OPI - My Vampire Is Buff, then I used Barry M - Satsuma, Barry M - Mushroom, Barry M - Key Lime, and Seche Vite topcoat 


This is what they looked like last year:


And now for the tutorial...

Step 1: Paint your nails with a basecoat of OPI - My Vampire Is Buff, you could also use white if you’d prefer
Step 2: Using the brush from the bottle of nail varnish or a separate brush, draw a semi-circle of orange
Step 3: Using a thin brush or striper, paint a lighter shade of orange (perhaps by mixing a bit of white with the orange as I did) in stripes to create a more pumpkin-like effect
Step 4: Using a brush paint a stem for the pumpkin using Barry M – Mushroom
Step 5: With the same thin brush, paint a spiral of green. I used Barry M – Key Lime
Step 6: Finish off with a topcoat to seal in your design and you’re done!

What do you think? Let me know in the comments!
Alice

China Glaze Monsters Ball Halloween 2013 Collection Swatches and Review

Hey everyone! I'm so excited for today's post, because I have the amazing China Glaze Monsters Ball collection to show you. This is my first time reviewing for China Glaze and the collection certainly doesn't disappoint. This a much more glitter-led halloween collection than I've seen China Glaze do before, but it works extremely well. And not only is it great for Halloween, but also for the rest of Autumn too! The rest of the pictures will be after the jump, as the post is probably going to be a long one


First up is Fang-tastic*, a purple, blue, green and pink glitter topcoat. This was 1 easy coat with no placement over 2 coats of China Glaze - Fifth Avenue


Next up is Howl You Doin'*, a dark purple glitter which would, as the name suggests, make a great background for nail art involving a full moon. This was 2 coats without topcoat. The first coat was incredibly difficult to apply and I thought I would need 3, but the second coat was much easier and it evened out well


I felt that this polish would look better with topcoat, and I'm so glad I tried it because it improved the polish so much. This is with 1 coat of Seche Vite:


Then we have Bat My Eyes*, which is very different to almost every other polish I own, and as a result I really like it, even though it's not the kind of colour I would usually go for. It's also very autumnal, it reminds me a lot of autumn leaves rather than bats, but I can also see where it got its namesake. This was 2 extremely easy coats without topcoat:


Next is Boogie Down*, the second glitter topper in the collection, this time a mixture of bronze, gold, black and white glitter, with the odd piece of bar glitter in there too. This was 1 coat over OPI - My Vampire Is Buff, with a limited amount of placement:


Then we have Bump in the Night*, which is an amazing black textured polish. I haven't yet seen another company do a black textured polish yet, I may just have not been on top of my game, but in my world this is a pretty unique specimin and I absolutely love it! This was 2 coats but only because I'm paranoid, 1 coat was extremely opaque and I could have easily got away with it:


Finally is my favourite of the collection, Ghoulish Glow*, as I love anything that glows in the dark! As many of you will know, this is not a new release for China Glaze, as Ghoulish Glow has made appearances in their halloween collections before. However, that doesn't mean that it's not still as awesome as it was when it came out. I also noticed that this actually glows a bit brighter than my bottle from last year. This was 1 coat over MASH white polish


Of course, I couldn't review this without posting a picture of them glowing! My camera isn't brilliant at focusing in the dark, so I'm afraid you have to put up with some blurry pictures but hopefully you get the gist! 


What do you think of this collection? Will you be buying any of the shades? Let me know in the comments!
Alice

Spotted Rose Curtains

Hey everyone! Just a quick post today because I've left it until late (yet again). I decided to recreate my 'rose curtains' nails for a tutorial for lookfantastic.com and once that was done I decided that I wanted to add a bit of a twist to them. I just got this Nubar Black Polka Dot nail varnish* from feelunique.com and I just couldn't wait to use it, so I thought I would combine the two. 


You can see the colours I used for the roses within my tutorial but the base is OPI - My Vampire is Buff and then I used 2 coats of Nubar Black Polka Dot*, with a bit of placement for the bigger pieces. I absolutely LOVE this glitter, and if you dont own it, you should. You can get it here 


Please let me know what you think of my tutorial, I tried something a little different this time around by not using my full hand, so let me know if you still think it's okay!

What do you think? Will you be buying Nubar Black Polka Dot?* You can get it from feelunique.com for just £6.80 (definitely worth it) and they have free worldwide delivery!
Alice

*some of the products in this post were provided to me for review but all opinions are entirely my own and were not influenced in any way

Digital Dozen Does Books - Day 2 'Ruby Red'

Hello everyone! As I mentioned yesterday, I was really struggling to come up with ideas for this week's digital dozen theme, so I had to resort to rifling through my bookcase for inspiration. Luckily I didn't have to search for very long as I came across Ruby Red by Linzi Glass and I knew instantly that I wanted to use it. 


The book:


To do these I started with a base of OPI - My Vampire is Buff, (which I FINALLY HAVE!) and then I used a tiny brush and white acrylic paint for the background flowers. I then added a coat of Seche Vite and decided to take a picture of them alone in case the next step went wrong (see below). I then used red acrylic paint and the same tiny brush for the flowers and writing, I just added different amounts of white and black paint for the different shades of red.


I actually really like the design on its own like that, and I was afraid I wouldnt like it with the flowers but I equally love both of them. Which do you prefer?


What do you think? Let me know in the comments!
Alice
