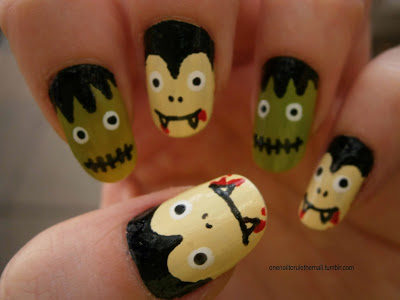
Then and Now: Frankenvamp + Tutorial
Hey everyone! I have the last of my 4 halloween tutorials for you today, don't forget to check out the tutorials tab at the top of my blog if you want to see the previous 3! This post is also another Then and Now post just like last week. I was so sad that I had to take these nails off for work, but at least with a blog I'm able to document my designs so I don't feel quite as bad when they have to go. Anyway, the tutorial and the 'now' nails will be after the jump!
The base for these nails was OPI - My Vampire is Buff (quite fitting), and Barry M - Key Lime, the black is acrylic paint, as is the white, and the red is Barry M - Bright Red, all topped off with a coat of Seche Vite
And these were what these looked like 2 years ago, I definitely prefer the Frankenstein nails now, the state of my cuticles, and my use of topcoat! Oh and also definitely my nail shape, what do you think?
Step 1: Paint your nails with your basecoat colours
Step 2: Using a thin brush and black nail polish or acrylic paint, paint on the hairline for both Frankenstein and Dracula, start at the tip of the hair and work your way up to the top to ensure neatness
Step 3: Using a thin brush paint lines for both monster’s mouths
Step 4: Then paint the teeth for Dracula and the lines for Frankenstein’s mouth using the same brush
Step 5: Using a dotting tool or cut down toothpick, paint on the eyes using white acrylic paint or nail varnish. You can also add a bit of blood using red around Dracula’s mouth at this stage
Step 6: Using either a dotting tool, brush or toothpick, paint on the centre of the eyes in black
Step 7: Draw on the noses of the monsters using your chosen tool
Step 8: Finish off with a topcoat to seal in your design and you’re done!
What do you think? Let me know in the comments!
Alice


0 comments: