Showing posts with label black outline. Show all posts

Tutorial Tuesday: Drips

Hey everyone! Today I'm starting a new feature called 'Tutorial Tuesday,' I have a tonne of tutorials to show you but I never seem to post them. I've added a tutorial tab to the top of my blog due to Sarah's fabulous suggestion, but it made me realise that I just don't have enough tutorials. So for at least the next 10 weeks I will be doing a tutorial every tuesday for you all, I hope you like it!

Today's tutorial is for my drip nails, I did these quite a while ago and a tutorial was requested, so to whoever requested it I'm very sorry it has taken so long


You will need:
·      Barry M – Lychee (or a cream/nude polish)
·      Barry M – Blueberry ice-cream (or a blue polish)
·      Barry M – Berry Ice Cream (or a lilac polish)
·      Barry M – Dragon Fruit (or a pink polish)
·      Barry M – Black and White nail art pens
·      Small brush
·      Top Coat


Step 1: Paint your nails with a base of Barry M – Lychee
Step 2: Using a small brush paint a basic outline for your drips, this doesn’t need to be perfect
Step 3: Colour in the lines from the previous step
Step 4: Using the black Barry M nail art pen, outline the drips
Step 5: Using the white Barry M nail art pen, draw the reflections for the drips
Step 6: Finish off with a topcoat to seal in your design, a matte topcoat is great for making the drips really stand out

And that's it! What do you think? Let me know in the comments
Alice

Digital Dozen Does Fashion: Day 4

Hey everyone! First of all I just wanted to announce that the giveaway winner has been chosen and contacted, and she has replied. Nail Girl's will announce her name on their Facebook page in the next few days I think. Anyway, I'm really sorry I didn't post last night, I was just too tired. I'm so happy to have a day off tomorrow! Day 5 will be tomorrow, and my very delayed 'which is best' for matte top coats will hopefully be Sunday so there's quite a bit coming up in the next few days. 

Today's post is based on another La Moda satchel, which has unfortunately sold out in this particular colour, but this is similar for those who fancy it.


The base of this is MASH - White, the nude is Butter LONDON Cuppa, the red is Jacava - Crimson Crush and the black is acrylic paint.


I decided to again mix the outside and the inside into one design, but it took me quite a while to work out how. This design was actually a bit of an accident because I had originally intended to post my nails fully with Cuppa but I forgot and painted them all with white and had to improvise! Nevertheless, I'm really happy with how it came out!


What do you think? Let me know in the comments!
Alice

*some of the products in this post were provided to me for review but all opinions are entirely my own

Digital Dozen Does Fashion: Day 1

Hey everyone! I'm back with another week of digital dozen posts for you. I unfortunately missed July but hopefully I'll be able to keep up with this week's post. I've just started a new job though so I might dwindle later in the week but we shall see. I apologise in advance if that does happen! 

So for the first day I'm bringing you some nails inspired by this* gorgeous La Moda satchel. I'm going to put the rest of this post after the jump because it's going to be a pretty long on.


Inside of the satchel
This design was inspired loosely by the inside of the satchel. I decided to do simplified butterflies on a yellow outlined background. I know the yellow polish I chose is a bit off the satchel colour, but in my 400+ polishes I couldn't find one that matched more. I clearly need to buy more polish! 


To do this design I started off with a base of Barry M - Yellow, then I used MASH - Black* for the outline, done with a thin brush, and for the butterflies. The white is acrylic paint. This was topped off with a coat of Seche Vite, followed by a coat of Butter LONDON Matte Top Coat.


I also did another design based on this bag, before I decided that I didn't particularly like it. However, as I spent the time doing it and editing it I thought I may as well show you it and you can decide for yourself!


For these nails I started with a base of Butter LONDON Cuppa, and Butter LONDON Jasper, and then I used striping tape and MASH - Black, which I also used alongside a thin brush for the butterflies. 


Which design do you prefer? And what do you think of the bag? You can shop it here. 
Let me know in the comments!
Alice

Dont forget to check out my giveaway, it only has 2 days left!

*some of the products in this post were provided to me for review but all opinions are entirely my own and were not influenced in any way

Barry M Nail Art Pens Review

Hey everyone! Today I have a post which I'm super excited to show you, using the 4 new Barry M nail art pens. They were released in Superdrug and online today (10th April) and will be released in Boots on the 17th April. As you will see, I highly recommend getting at least one of these pens because they're awesome and completely unlike any other nail art pens I've tried before. More after the jump!


First up is the White Nail Art Pen. The design I chose to do was inspired by this Nancy Mc design, which I've wanted to do for ages but haven't had the courage to do with a brush. I started with a base of OPI - Just a Little Rosti at This and then drew a line followed by two dots on either side for the bone, then I topped it all off with a coat of Seche Vite. 


I also did a matte version of these nails, because you know I can never resist, which do you prefer?


As you can see the nib is unlike most nail art pens. Rather than squeezing thick nail varnish through a tiny needle (which always gets blocked) you instead push the end of this down until the nail varnish flows through it. I'm not entirely sure if this is pure nail varnish, because although it's super opaque it's a lot runnier than usual, but it's definitely better than any other nail art pen I've tried. 


This Silver Nail Art Pen was probably my least favourite of the bunch. In person the silver looked completely opaque so if you're not a nail blogger like me it shouldn't matter, but the camera made these look quite translucent. I think I may have done something wrong and I shall be trying this again to make sure because the rest of the pens are great. My only issue with this is the opacity, and another layer over this would have solved that, so overall it's still a great pen. 

For this design I painted 2 layers of Barry M - Black, and then I painted a layer of Barry M - Aqua Green over the top for the duochrome effect. I painted on the baroque print using the silver nail art pen and topped it off with a layer of Seche Vite. 


I absolutely love this Pink Nail Art Pen, and I'm so glad they chose to include it as it gives a burst of colour to the collection. I really hope they bring out more shades because my experience of these so far has been nothing but positive! (Blue perhaps?) This pink is super opaque and dries really quickly. 

Anyway, for this design I started with a base of Essence - That's What I Mint and then I painted on the hearts in pink, then I outlined them with dots and added the lines using the White Nail Art Pen. Then I topped it off with a coat of Seche Vite. 


Last but not least is the Black Nail Art Pen, This and the white are my favourite of the pens, they're opaque and easy to use, as are all the pens, but I absolutely love creating nail art with black and white, so I'm sure you'll be seeing a lot more of these. 

For this design I started with a base colour of an unknown purple, and then added Sinful Colours - Frenzy over the top. To smooth it out I added a coat of Seche Vite before doing the rest of my design. I then drew the outline of the bow in Essence - That's What I Mint, using a MASH - medium length striper brush, and when that was dry I added the spots using the White Nail Art Pen, and then outlined it in the Black Nail Art Pen, topped off with another coat of Seche Vite.

These nails were inspired by this design by Lexi over at Finger Painted, but I'm afraid it's nowhere near as good!


Overall I'm super impressed with this collection. They're wonderfully opaque, except my slight issue with the silver, they dry fast and they're not thick at all so they wont smudge with a top coat if you apply it soon after. I really hope Barry M bring out more shades of these pens because I think they're brilliant and you'll definitely be seeing more designs using these on my blog over the next few months. 

What do you think? Will you be picking up any of these colours? And which is your favourite design I created with them? Let me know in the comments!
Alice

This product was sent to me for review but any opinions included are entirely my own and were not affected in any way.

Pop out nails

Hey everyone! I dont really know what to call these nails, so 'pop out' shall have to do. Unless you have any better ideas? I was inspired to do these by Nancy Mc Nails, mine are nowhere near as good as hers but I aspire to be as good as her one day! (Teach me your secrets Nancy!) I love this new pink I got from Very Emily and I really wanted to use it, so I put the two wishes together and created these.

I originally did these shiny as Nancy does, but I didn't feel like they were photographing very well so I added a matte top coat (any excuse, ey?), but I've included a shiny picture for you to compare and tell me which you prefer. 


To create these I started with a base of Essence - Free Hugs which is a brilliant vibrant pink and I'm sure you'll be seeing a lot more of it on the blog. Then I added China Glaze - Liquid Leather around the edges with a small paintbrush, and any mistakes I just went over in pink. Then I added a line of MASH - White Nail Polish, and topped it off with a coat of Seche Vite. And then to make it matte I added MASH - Matte top coat (which is half price on their website at the moment by the way!). 


Here's the design shiny, which do you prefer?


Let me know what you think in the comments!
Alice

Trying out the pens again!

Hey everyone! Hope you all had a fantastic christmas, mine was lovely but unfortunately now I feel really ill and working with nail varnish tonight really hasn't helped! Anyway, today I decided to try out using pens for nail art again, I got a lot of questions about them last time so here is where to get them if you're interested. They're also the only pens I'll ever use for writing for some reason because I love them so much!

I thought it would be nice to do something using China Glaze 'Something Sweet' which I've wanted to use again for a while. I was going to do some more paisley print but I didn't think you guys would want to see the same design again, at least not for a while! So I decided to do some flowers, and although they looked pretty good plain I decided to add a bit of Barry M Gold Foil, and now I kind of wish I'd added white too but I still quite like them.


Hope you like them! Alice

Nudey drips

Oh what's that? More matte nails? Of course! I couldn't resist, I'm sorry, but I did originally do these shiny (technical terms) and didn't really like how the photos came out unfortunately, so I added matte and now they look awesome-r (duh). I love these cartoon drips, I see them everywhere so unfortunately I dont know who they originated from, if you know let me know and I'll give correct credit!


For the base I used OPI - Did you 'ear about Van Gogh, and then using a dotting tool I put on Barry M -Berry and China Glaze - For Audrey, later outlined and highlighted in acrylic paint.


Do you think I should have kept them shiny or is my neverending use of matte as awesome as I see it to be (hint hint)? Alice

Nude flowers/return of the matte attack

Hi girls! I wasn't actually going to post today, but then I saw this lovely post on instagram and I just had to do it. You all know my love of matte nails so of course it was instantly appealing to me, and as soon as I got back from university I sat down and started on them. They were relatively easy to complete, I've just cut one of my small brushes down even smaller, it was my first time doing it and I think it could actually do with being smaller but it will do for now, and so I wanted to use it for a bit of outlining to see how it looked.


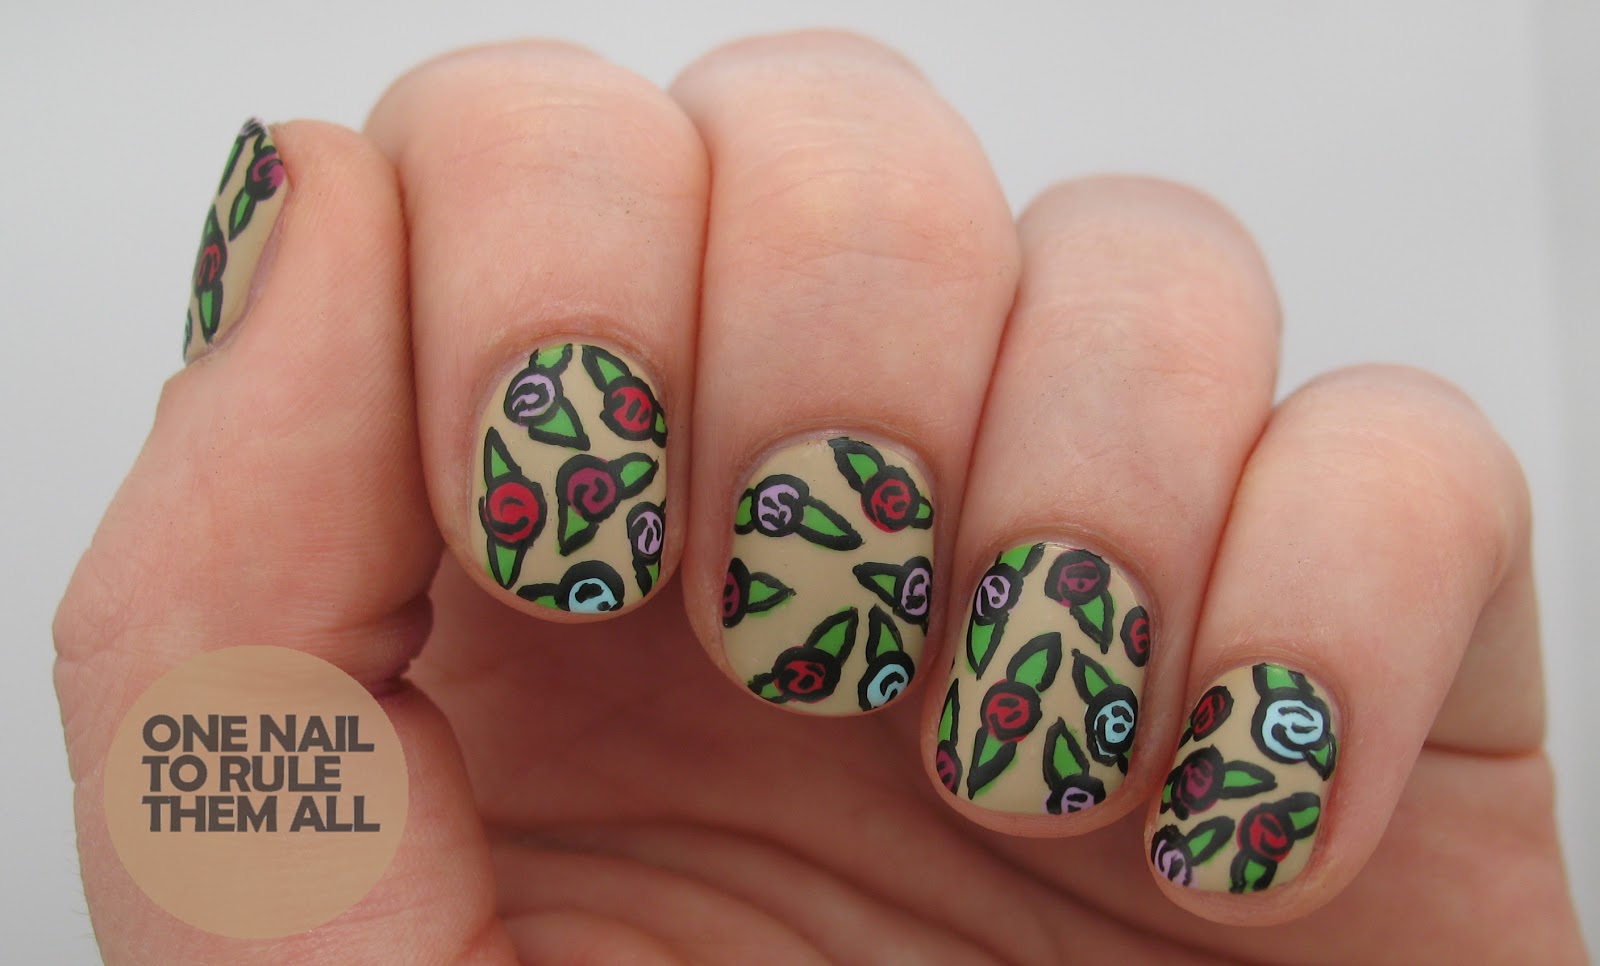
Firstly I painted my nails nude using Nails Inc 'great pulteney street' from the colour burst set (can you tell I love that set yet? haha) and then I used a dotting tool to place random dots of Barry M - Berry, Barry M - Red, Unnamed dark purple No 7 (no label, boo!) and Models Own - Blooboo. Then I used a small brush (not the cut down one) to paint on the leaves in China Glaze - Gaga for green, and then I outlined it all in black acrylic paint and a very small brush


I've always loved the look of things outlined in black (especially when it's matte), what do you think? Let me know in the comments! 

Alice