Some of you might recall the anchor nails I did a while back:
Evidently this picture turned out to be one of my most stolen pictures. I constantly find it on fashion Instagram pages and such. Anyway I was asked to make a tutorial for the anchor so that's what I have for you today.
Step One:
Paint your base color. For this tutorial I used China Glaze That's Shore Bright.
In my original design I used Essie First Timer.
Step Two:
Start your anchor by painting a small circle. This will the the top of your anchor.
Step Three:
Make a thin line straight down from the circle.
Step Four:
Paint the sides of the anchor, make sure the bottom is relatively pointy.
Step Five:
Paint points on the end of the sides of the anchor.
Step Six:
Paint a short line, crossing the anchor around the middle.
Step Seven (kind of):
To complete the look add nails with polka dots and stripes. Glitter too! I used Essie Beyond Cozy in the original design.
Hope you like this. Let me know if you try, I'd love to see!
Picture to sum it all up:
Thanks for reading!
Hello everyone! Welcome to the last installment of my seashell pictorials.
This is the third and final shell and it looks a bit like this:
STEP ONE:
Use a thin paintbrush and black paint/polish to paint a circular pacman looking shape.
(spare me, it's 1:30 AM)
STEP TWO:
Fill in the inside of the shell with a tan paint/polish.
STEP THREE:
Re-outline the shell, be sure to make a swirl inside the shell with the black paint/polish.
STEP FOUR:
Paint thin, short strokes of white paint/polish inside the shell.
STEP FIVE:
Repeat step four but with brown paint/polish. Slightly overlap the two colors.
and that's it!
I hope this was something you guys enjoyed. I'm actually kind of impressed I actually got this all done. I'm kind of the laziest person EVER.
anyway if you guys try this please tag me! I would love to see!
Thanks for reading!
As previously stated, I made three pictorials on different types of shells.
Here is the second installation. This type of shell looks similar to this:
STEP ONE:
Start by using a thin paintbrush to paint the basic outline of the shell. Start at the bottom and make your way up.
STEP TWO:
Paint the inside of the shell with a tan paint/polish. I used a tan acrylic paint.
STEP THREE:
Re-outline the shell with black paint/polish.
STEP FOUR:
Use a darker brown paint/polish and shade in the side of the shell.
STEP FIVE:
Add highlights with a white paint/polish on the side opposite the dark brown.
Well that's it! Pretty simple! If you have any questions feel free to email me or comment below!
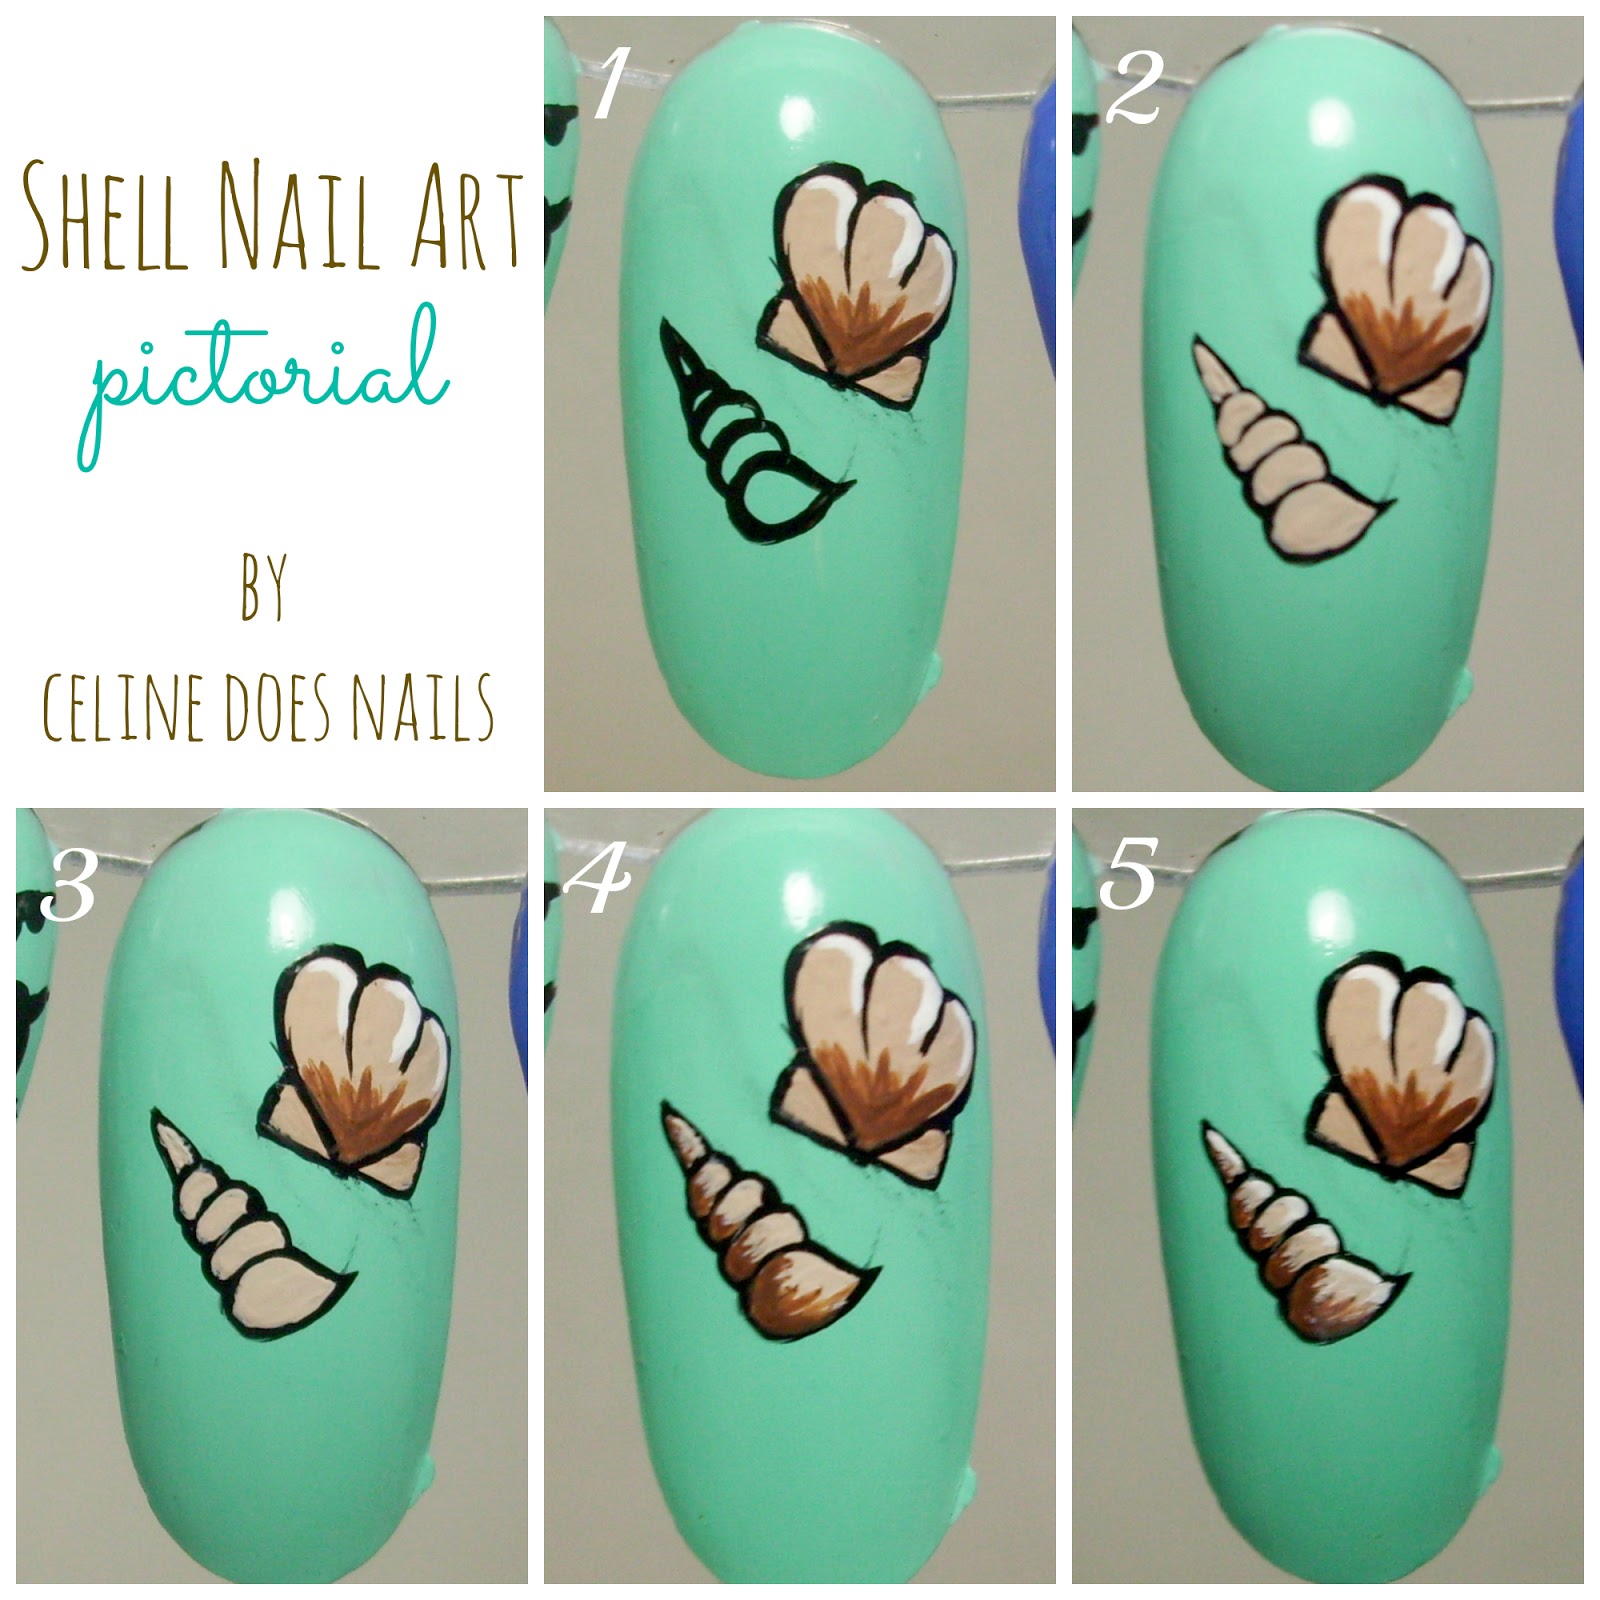
Here's a picture to sum it all up:
Thanks for reading!
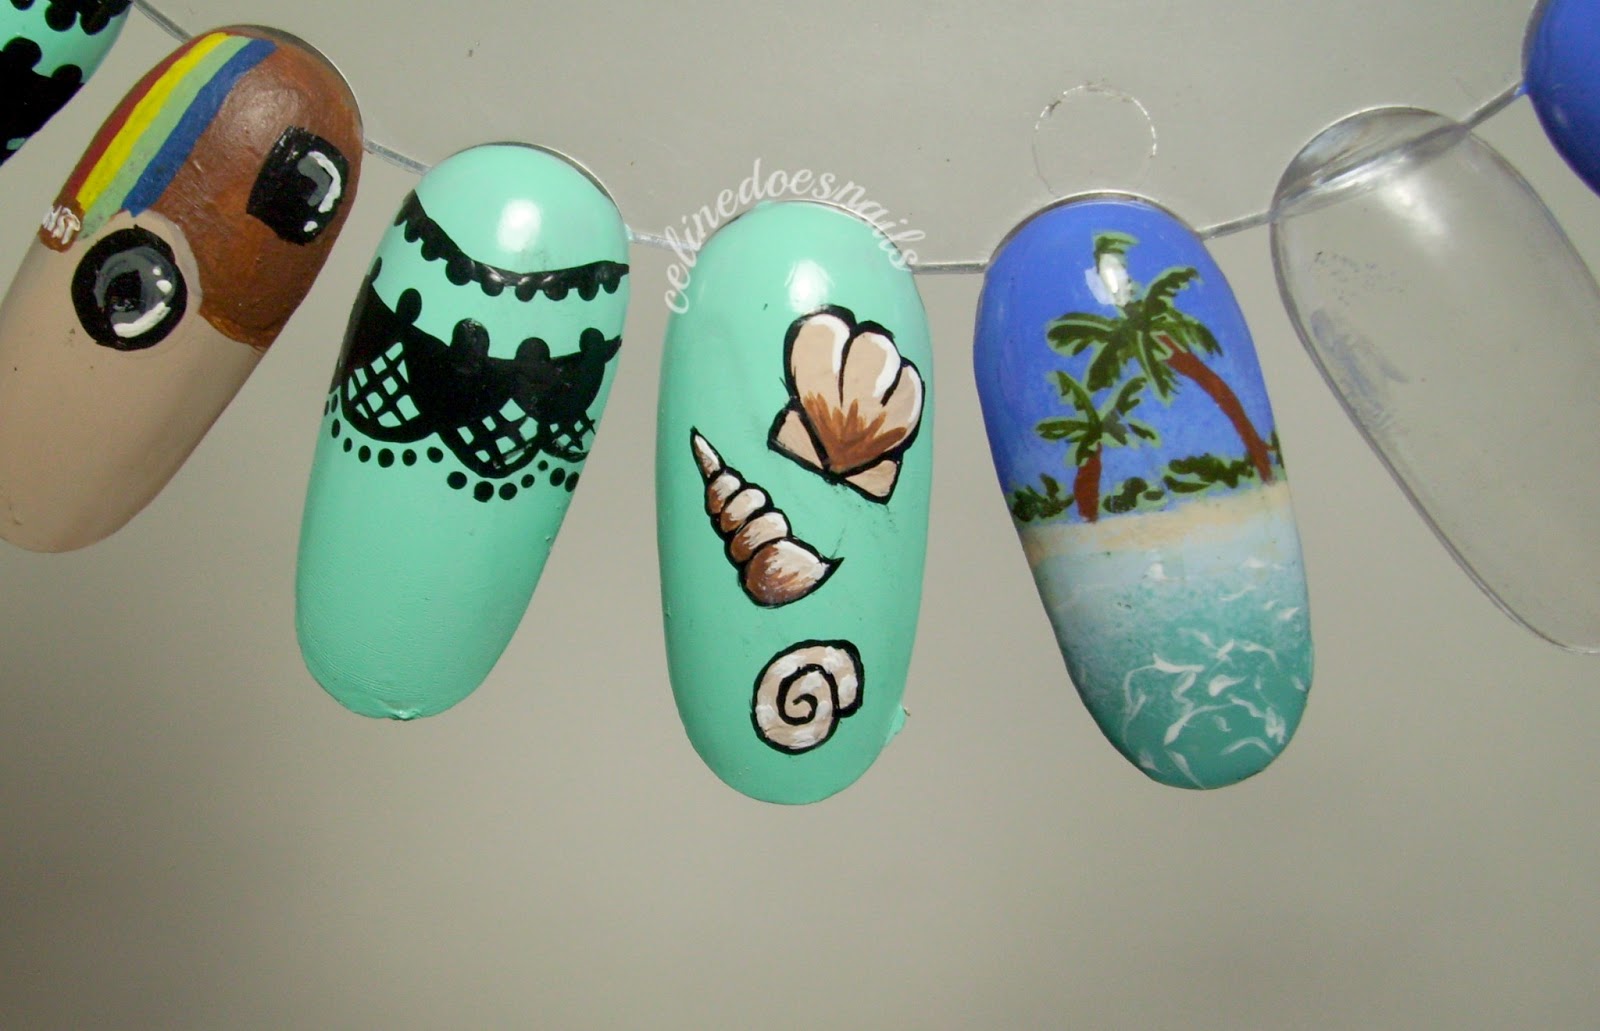
As previously stated, I made pictorials for the shells I did in
this manicure.
I divided them up into three posts because it's a lot to take in.
Here's the first.
I'm not familiar with the types of shells but it looks like this:
STEP ONE:Paint a base color. I used Island Girl Surfer Babe.
STEP TWO:Using a thin paintbrush and paint/polish, paint a rectangle.
STEP THREE:Paint two lines down to the bottom center, kind of like an envelope.
STEP FOUR:Connect the lines from the previous step and paint the rest of the shell.
STEP FIVE:Fill in the shell with a paint/polish. I used a tan acrylic paint.
STEP SIX:Repaint the outline. Make sure to paint the pointy end at the bottom.
STEP SEVEN:
Using a darker brown paint/polish, fill in the bottom to add some shading.
STEP EIGHT:
Lastly, add some highlight by painting thin white lines against the outline of the shell.
Hope this was helpful! If you have any questions, feel free to ask!
Here's a simple pictorial just to sum it all up:
Thanks for reading!
As you might recall, yesterday I posted these nails.
As I mentioned, I did make a pictorial for the anchor, so here we go.
I used this picture for reference. You may find it helpful to look at this while doing your nails.
STEP ONE:
Paint a base color. I used OPI My Boyfriend Scales Walls
STEP TWO:
Using a thin brush, paint almost a cross shape. This is the basis of your anchor.
STEP THREE:
Add the circles at the top and the hooky things at the bottom.
(wow that was the worst explanation ever. Hopefully you know what I mean)
STEP FOUR:
Paint thin lines in to add shading. They don't have to be perfect.
STEP FIVE:
This is where I begin to paint the roses. It's difficult to show, so
this video is extremely helpful and is exactly how I do my roses.
STEP SIX:
Paint leaves with a light green.
I believe the video in the link above shows how to do leaves as well, but I included them in my steps anyway.
STEP SEVEN:
Paint darker green inside the leaves.
STEP EIGHT:
Add the different colors into the roses (again watch the video, I'm serious)
Topcoat your design and you're done!
I really hope you guys try this!
Here's a simple version:
♡Celine
This is the second installment on my whole "redoing my old pictorials" plan.
You can see the original
here, although I would suggest not because it's pretty awful. So without further ado, here's the new and improved version.
Step One:
Paint a base color. I chose China Glaze's "Flip Flop Fantasy" You can either paint the entire nail or diagonally like in the photo.
Step Two:
Using a dotting tool (or bobby pin, pen, anything else you're comfortable making dots with) and paint/polish, diagonally place dots down the nail.
Step Three:
Paint three (or however many fits) half circles along the dots.
Step Four:
Repeat step 3. (haha!)
Step Five:
Again with a dotting tool (or anything else that can make dots), place dots on the outside of the half circles. That's it! It's a pretty simple design.
Here's a super simple photo that shows all the steps: