*The products in this post were purchased with my own money.
Today's mani came to me in a dream. No, seriously, I woke up with the idea so I must have dreamed it. And it looks really awesome in my opinion.
What do you think? I'm reminded slightly of Doctor Who Dalek. The stripes on the side don't fit a Dalek, but the resemblance is there.
I started with two coats of OPI Strawberry Margarita from the OPI Best of the Best mini collection. Strawberry Margarita is originally from the Beach Party Collection, and I can see why. It's such a yummy bright pink — perfect for the beach.
I used tape to create the thin lines up and down on either side and filled them in with Petites Black. Then I used a nail art brush to create the thicker stripes across. You could also do this with tape, but I found it faster, if less neat and precise, to freehand them.
I added a coat of Seche Vite and thought it looked bare. It needed something, so I dug out my Born Pretty Store studs. I vowed to use these more often and this was the perfect opportunity. I decided on the black studs. I've never found the perfect mani for these so I've never used them before! Exciting!!
The best way I've found to use these types of studs is to lay them on your nail over dry polish first so you can get the perfect spacing and positioning. Then pick them up one by one with tweezers and lightly dip the bottom in clear polish and set them back down. It gives you more leeway as you can decide you don't like the design and move them around. You can't do this if you just pick them up and slap them on wet polish. There's no changing your mind after that! I really hope this tip helps someone. :)
*The products in this post were purchased with my own money.
So
Born Pretty Store sent me these
steel ball studs. They’re awesome and really diverse. Starting off, when you order them you get A LOT for your money. You get both gold and silver studs. The picture shown on the website is accurate to the actual product. Being only $4.17, with free shipping, this is a good deal.
To apply these, I used tweezers. You have to apply when your polish is still somewhat wet so they’ll stay better. I put one coat of top coat and they lasted a reasonable amount of time. They stay better when you have them in a cluster. Like the heart, as opposed to the other nail in that picture.
Once I received these studs, I knew I wanted to do a "nautical" themed manicure using them. Love the way the studs add to this mani.
Overall, I am very happy with the studs. I had no problems with them and they are fairly easy to use- maybe a little time consuming, but hey that’s okay! They add the awesome 3-D effect to your manicure without too much hassle. I would definitely recommend to anyone looking for cheap, quality products.
If you want to order these, or any other product from the
Born Pretty Store, feel free to use my coupon code, XKL91 at checkout for 10% off. Remember there is free shipping!
Hello again! Gradients seem to be the thing for me lately. I think it's the coming of Spring and Summer; I'm just preparing! So I dug out the most pastel colors I own for a pretty and feminine spring gradient — a little early, but it would be perfect for Easter.
Those most pastel colors I own just happened to be Sally Hansen Pink Blink, Petites Color Fever Creme Blue, and Revlon Enchanting. I decided to try a makeup sponge with this gradient instead of my usual eyeshadow applicator. I like the smooth fade between colors, but I didn't like the extra work it took to get the colors built up. I also thought it was beyond time to break out my Born Pretty Store gold metal studs. I received these by mistake with an old order and they were nice enough to let me keep them while also shipping out the ones I did order. It's been too long since I played with these studs. ;)
I'm thinking it's also been too long since I ordered anything from the Born Pretty Store. I forgot how awesome their nail decorations are! And they've come out with so much more since my last order. I'm dying for the hearts ... and the squares ... and the stars ... and ... well, I think you get the idea! I'll definitely be ordering something.
You can use the code MLE10W21 at checkout for 10% off your order if you decide to purchase something from the Born Pretty Store too!
Hello, lovelies! How do my nails look? These are the first pictures since I broke the index nail of this hand and did an emergency teabag fix. It's holding up great!!
As for this post, I bring you a new product today. Or rather, New York Color (NYC) brings you a new product. It's a mattifying top coat (yep, they called it mattifying) they've named Matte Me Crazy.
I was stunned to find this on the shelf. The only matte top coat to be found around here is Hard Candy's, Matte-ly in Love, found exclusively in Walmart. Hard Candy will cost you about $4 for a .35 fl oz bottle. It will even get you a cute little cardboard topper that fits over the cap. This makes finding it in a polish drawer very easy!
But, the reason I was so excited to find this new matte top coat is that NYC costs under $2 for a .33 fl oz bottle and can be bought in a multitude of locations. Sadly, it doesn't come with a cardboard topper and is not so easy to find in a polish drawer. :(
Now for the nitty gritty. Hard Candy has a much thicker formula. Hard Candy passed the drip test with flying colors. NYC ... not so much. It gave two very quick drips and a slower third before leveling out on the brush.
While on the subject of brushes. Hard Candy has a short, rounded brush with a slightly short and round cap. It fits in my hand okay but its short length may not be comfortable for everyone. NYC has a longer and wider brush that's attached to a round cone like cap. My preference in brushes have always leaned towards the wider and flatter. I adore the Sally Hansen flat brush and the new Wet n Wild megalast Pro brush so I prefer the NYC brush.
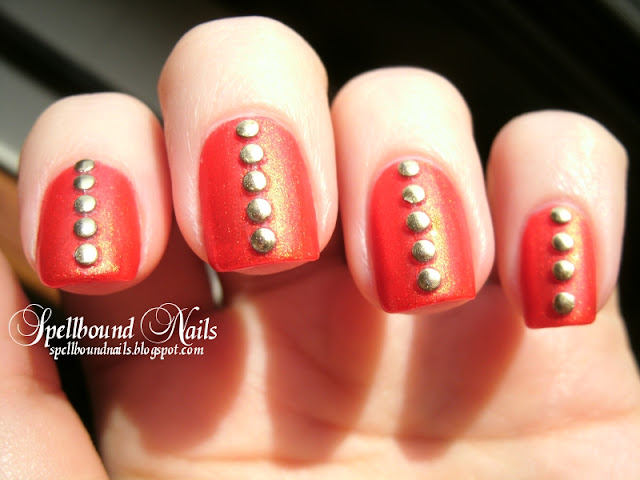
I don't think Riveting was the polish to go for when testing out a new matte top coat. I know it turned matte but I'm not sure just how matte. I can however tell you that NYC mattified slower than Hard Candy. I was actually kind of pleased about this though. I've had trouble with one part of my nails turning more matte than another with Hard Candy because it dried and turned matte too quickly. I don't know about anyone else, but I paint backwards so my pinkie nail was just settling into fully matte by the time I started my thumb with NYC. I had no streaking or blobs of darker matte with NYC.
I will definitely give you a more thorough answer on just how matte is matte when talking about these two in another post with another mani. NYC may just be a good substitute for the more expensive Hard Candy. We'll see ... probably sometime next week.


.jpeg)



