Showing posts with label Halloween. Show all posts

The Remembrance Duo - and a sale on Halloween polishes

Hey gals! I bring some really sad news. My family has recently lost a member. My bonus-dad (my dad in all but blood) passed suddenly on October 25th. He was so proud of me for making polish - such an odd thing for a big, gruff guy like him to proud of but he was always telling anyone who would listen that I actually make my own polish ... and sell it too! I wanted to honor the wonderful man he was and the broken hearts he left behind ... and I guess this is the only way I feel I can do that.

I also want you to know that I keep nothing from selling these polishes. ALL proceeds will go to my mom to help her pay bills and funeral costs.

Teal We Meet Again - Teal Holographic and Butterflies and Broken Hearts - Silver Holographic Butterflies, Black Broken Hearts, green glitter, and black and silver holographic micro-glitter

This is The Remembrance Duo. It includes Teal We Meet Again and Butterflies and Broken Hearts. As part of The Remembrance Duo is the only place you will ever be able to buy Teal We Meet Again. However, if you want just the glitter topper Butterflies and Broken Hearts can be about alone.

These polishes are being sold at a slightly increased price ($10 for the glitter topper and $20 for the duo).


Butterflies and Broken Hearts has a lot of meaning to me and my family. My mom taught me early her belief that butterflies are messengers of heaven and that every time you see a butterfly it is simply a loved one's way of waving hello from the great beyond. I couldn't create a memorial polish without including lots of silver holographic butterflies. The black hearts are of course the broken hearts he left us with. You'll also find tons of green (my bonus-dad's favorite color), as well as lots of holographic black and holographic silver glitter.


Teal We Meet Again is a gorgeous teal holographic polish that makes a stunning base for Butterflies and Broken Hearts. I really don't think you could find a more perfect pair.


On a side note, there are still a few polishes from the Halloween 2013 Collection left that can now be bought on sale.

Suloisemmat Halloween-kynnet


Huh, tämä flunssa alkaa vähitellen viemään loputkin voimani. Luulin että olin päässyt jo pahimman  yli, mutta eilen oli taas kuumeilupäivä :'( Pidemmittä puheitta esittelen siis tämän vuoden Halloween-lakkauksen. 

Ei ollut kauheasti energiaa suunnitella mitään maata mullistavaa, joten onneksi olin tilannut Adeninalta söpön Halloween-siirtokuvasetin*. Yhdistin siirtokuvat Zoyan Cashmeres -kokoelman suklaanruskean Louisen* ja pirteän oranssin Color Club You Got Soul-arin kanssa. You Got Soul-ar toimi nimettömässä lakkauksen väripillkuna, kun taas muut kynnet saivat ylleen suklaisen sävytteen. Halusin vähän syvyyttä ruskeisiin ja kynsiin, joten töpöttelin niihin vähän kamelinruskeaa Zoya Flynniä meikkisienellä. Pelkäsin myös että siirtokuvien mustat kuvioit eivät erottuisi tarpeeksi tummasta taustasta, ja Flynnillä sain vähän vaalennettua sitä. Louise oli käytettävyydeltään perus Zoya-laatua. Se levittyi helposti, peitti hyvin ja kuivui nopsaan (kynsillä kaksi kerrosta). Kimaltavaa You Got Soul-aria tarvitsi kolme kerrosta.

Pikkurillin kynteen kiinnitin siirtokuvan sijasta pyöreän oranssin niitin (myös Adeninalta) ja mattasin sen essie matte about you* mattapäällyslakalla. Lopuksi tein vielä tavallisella päällyslakka pieniä kiiltäviä "koukeroita" sen päälle :p Myös etusormeen tuli mattapäällyslakkaa. En osannut päättää mattaanko oranssin kissakynnen myös, joten kokeilin molempia versioita. :D Postauksen kahdessa ensimmäisessä kuvassa kynsi on kiiltävällä päällyslakalla ja kolmannessa taas mattana. 


Mitäs pidätte? Nyt tämä painuu takaisin sängynpohjalle. No okei, menen oikeasti sohvalle kuuman teemukin kanssa katsomaan uutta lempi "flunssanpiristys sarjaani" eli Parks and Recreationia :P ...Postauksen kirjoitusvirheet ja mahdollisen sekavuuden pistän flunssan piikkiin.

Essie matte about you, Zoya Louise, Zoya Flynn, Color Club You Got Soul-ar,
siirtokuvia/ water decaleita ja pyöreitä niittejä.


*Essie ja Zoya-lakat, siirtokuvat ja niitit saatu blogin kautta.

Slenderman

Happy Halloween everyone! I'm so excited to show you my final Halloween design: Slenderman nails! I know all my other designs have been quite cute this year but I wanted to try something a little different. For those of you who don't know what Slenderman is, he's the character of the game Slender, which is basically just an incredibly creepy game. I'm too much of a wuss to have played it personally, having got scared enough just watching someone else play! If you want to read more about it, the wiki page for the game is here. Hopefully though, most of you know what the game is, and therefore can understand the meaning behind each of these nails.


On my thumb I have the Slender writing (albeit a bit thicker than the actual text), on my ring and pointer finger I have the trees and moon which represent the creepy setting of the game, on my middle finger I have slenderman himself, and then on my pinky I have one of the eight pages you have to find throughout the game. 

The base for these nails was Alessandro - Midnight Black, then I sponged on No. 7 Grey Skies, the white and black is all done with acrylic paint, I then used a coat of Seche Vite before finishing with a coat of Butter London Matte Finish 


What do you think? Let me know in the comments!
Alice

Then and Now: Frankenvamp + Tutorial

Hey everyone! I have the last of my 4 halloween tutorials for you today, don't forget to check out the tutorials tab at the top of my blog if you want to see the previous 3! This post is also another Then and Now post just like last week. I was so sad that I had to take these nails off for work, but at least with a blog I'm able to document my designs so I don't feel quite as bad when they have to go. Anyway, the tutorial and the 'now' nails will be after the jump!


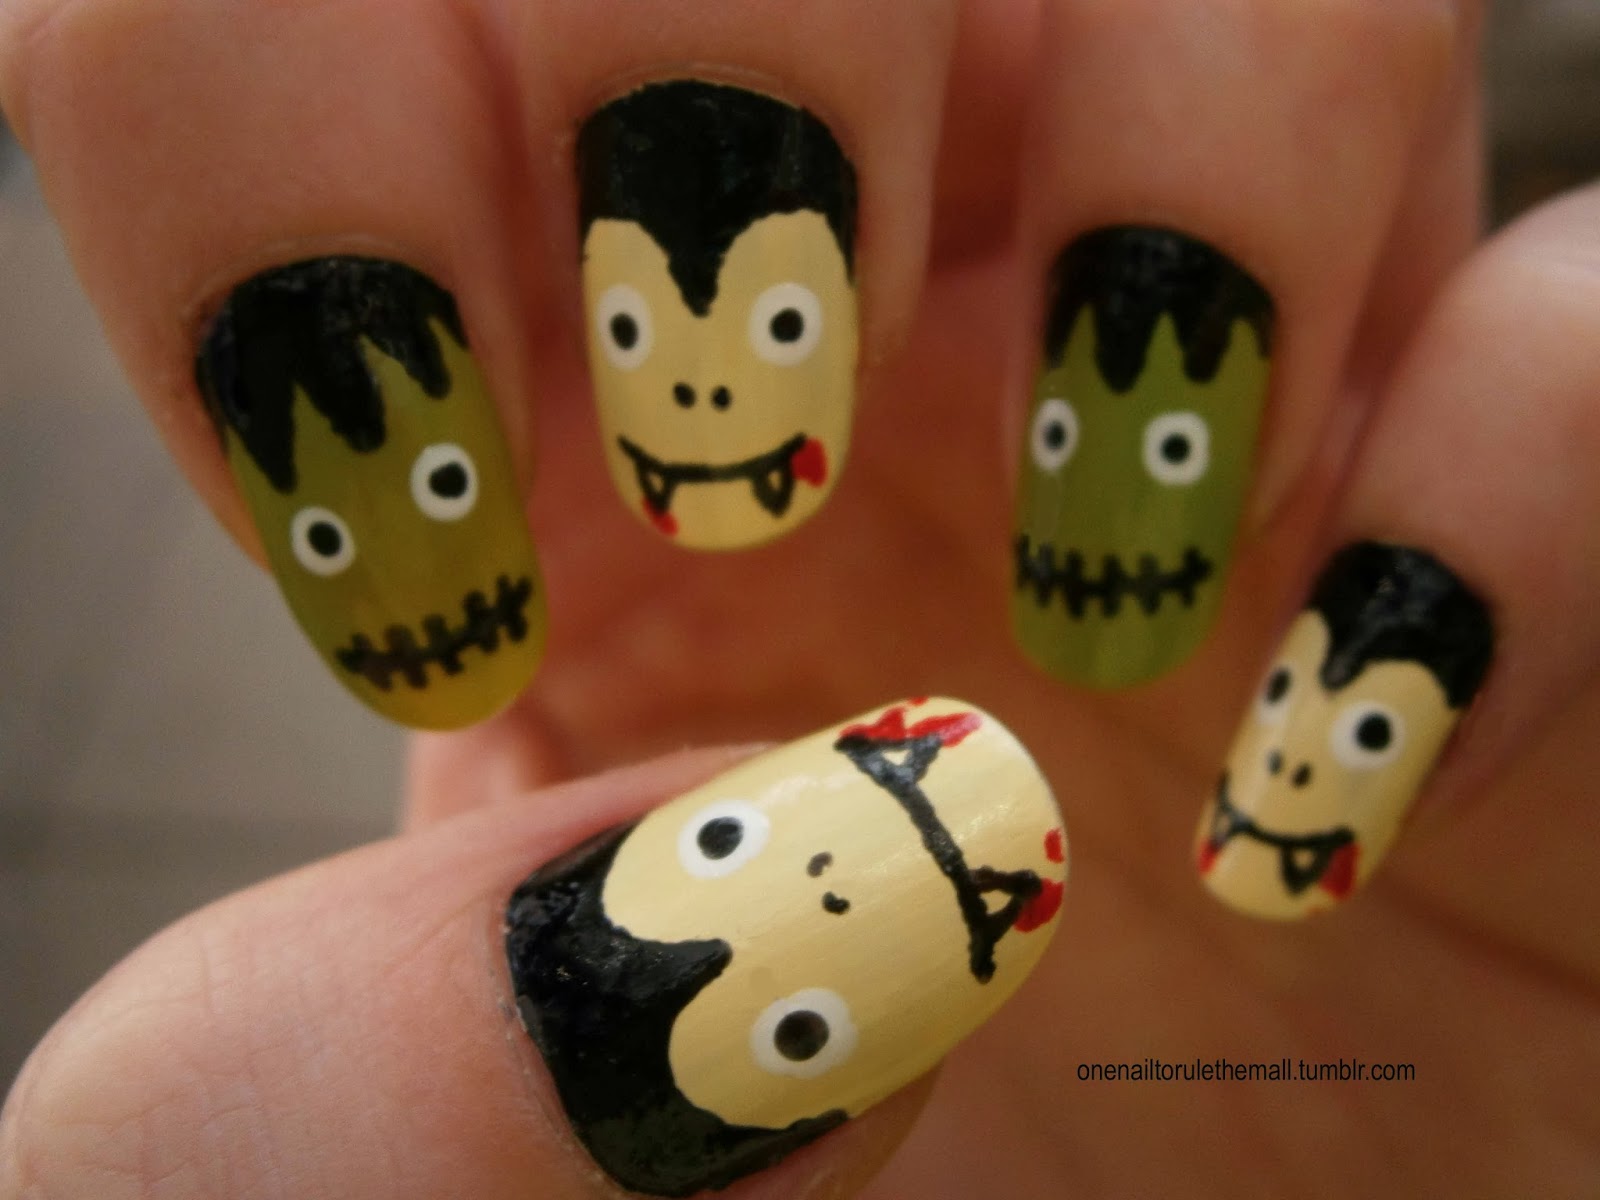
The base for these nails was OPI - My Vampire is Buff (quite fitting), and Barry M - Key Lime, the black is acrylic paint, as is the white, and the red is Barry M - Bright Red, all topped off with a coat of Seche Vite


And these were what these looked like 2 years ago, I definitely prefer the Frankenstein nails now, the state of my cuticles, and my use of topcoat! Oh and also definitely my nail shape, what do you think?

Step 1: Paint your nails with your basecoat colours
Step 2: Using a thin brush and black nail polish or acrylic paint, paint on the hairline for both Frankenstein and Dracula, start at the tip of the hair and work your way up to the top to ensure neatness
Step 3: Using a thin brush paint lines for both monster’s mouths
Step 4: Then paint the teeth for Dracula and the lines for Frankenstein’s mouth using the same brush
Step 5: Using a dotting tool or cut down toothpick, paint on the eyes using white acrylic paint or nail varnish. You can also add a bit of blood using red around Dracula’s mouth at this stage
Step 6: Using either a dotting tool, brush or toothpick, paint on the centre of the eyes in black
Step 7: Draw on the noses of the monsters using your chosen tool
Step 8: Finish off with a topcoat to seal in your design and you’re done!

What do you think? Let me know in the comments!
Alice

Tutorial Tuesday: Models Own Velvet Spiderwebs

Hey everyone! I'm sorry it's been a few days since I last posted, I've been trying to get on top of the mountain of coursework that's due in very soon, and unfortunately that means my nails have fallen by the wayside. However, I still have 3 halloween posts for you (yep, I did an extra design) and I'm so excited for you to see the one I'll be posting on halloween itself. Today's post is a tutorial for these cute(ish) spider nails, which were done on a base of Models Own Obsidian*, from the Velvet Goth collection. The tutorial and swatches of Obsidian will be after the jump


These were quite rushed as I was doing them before I went for a train, but hopefully you'll still be able to gain something from the tutorial, in fact your version will probably be better than mine!


This was 2 coats of Models Own - Obsidian*. It's a little bit different to Absinthe from the same collection, which I showed you the other day, as the smaller glitter is more like bar glitter. Like Absinthe, this polish is completely enhanced with a topcoat, as you can see in the nail art picture above.


 And now for the tutorial! Enjoy:
Step 1: Paint your nails with your chosen base colour
Step 2: Paint an oval shape for the centre of your spider, and paint lines coming out from the corner of your nails, alternate between your nails for each design
Step 3: Using a thin brush paint ‘C’ shapes between the lines to create the spiderweb, and add the legs to the spider
Step 4: With a thin brush or dotting tool, paint on the eyes in black
Step 5: Paint white in the centre of the eyes (optional)
Step 6: Finish off with a topcoat to seal in your design, and you’re done!

What do you think? Let me know in the comments!
Alice

Halloween Nail Art: Scarily Cute Faces

Ok, ok, I promise this is the LAST Halloween nail art I'll do! The possibilities for a Halloween mani are endless, and I didn't want to jam pack my blog with a million other posts (especially since I've already posted Sparkles & Spiders, Crazy Pumpkins and Black Cat Silhouettes), but I was desperate to attempt a much more detailed design as my recent ones have been kind of basic. Anyway, to avoid an overwhelming amount of Halloween manicures, I decided to combine a few different concepts into one. Cue an unbelievable amount of nail polish, paint brushes, acetone and swearing (sorry Mum) in my creation of Scarily Cute Halloween Faces!

The equipment:

Sinful Colors 'Snow Me White'
e.l.f. Cosmetics 'Smokin Hot'
Barry M 'Papaya'
Fearne 'Burnt Out'
Sinful Colors 'Pistache'
No. 7 'Totally Teal'
Rimmel 'Grey Matter'
W7 'Purple'
Models Own black nail art pen
Models Own white nail art pen
So, as always, I started out with my bases. I alternated 'Snow Me White' with 'Smokin Hot', as I always enjoy a bit of variation. To achieve a good, opaque finish, all nails required three coats. Once dry, I added the block base colours. For my thumb's pumpkin head I used 'Papaya' and a medium sized nail art brush, and painted a slightly squashed circle with a few bumpy bits. For the skeleton on my index finger nail, I painted a circle with 'Grey Matter' and filled it in, then added a smaller circle protruding from the bottom. For Frankenstein's monster, I painted a rectangle with 'Pistache'. The vampire's face was a simple grey circle filled in, and the same for the cat but with black. 
Next, using a very finer nail art brush, I began to add the details. For every face I applied two large white eyes and mouths in black (apart from the cat). For the pumpkin, I used 'Burnt Out' to add a couple of lines for extra shape and colour. Then I painted a stalk with 'Pistache' and 'Totally Teal'. I added pupils and a glint with Models Own nail art pens, and then some pointy fans, which I sharpened up with my tiniest paint brush. Finally, I outlined the top sections of the eyes in black, and painted a tiny triangle for a nose. I decided my pumpkin looked a little bit strange just floating around in the middle of my nail, so I gave him some shoulders and a body. To tie in with the stalk, I painted stripes with 'Pistache' and 'Totally Teal'.
Next up, the skeleton! This face was one of the easiest, and I simply added little white dots for teeth and two small lines for a nose. I kept the eyes the same as the pumpkin's, and then added a couple of ribs for its body. There wasn't enough room on my nail to add too many details, which is a shame because skeletons always look so effective. Never mind!
For Frankenstein's monster I varied the eyes and added dark green eyelids. Then I gave him some black hair, and bolts through his neck in grey. His teeth also ended up spiky like the pumpkin's, which wasn't really intentional, it just kind of happened! For a bit of extra colour I gave him a purple jacket, which I think goes really well with his gorgeous green skin...
The vampire ended up being very detailed, and caused me quite a few problems. After adding fangs and some hair, I decided he needed a black cape and a red bow tie. This was extremely fiddly, even with a tiny paint brush, but I think it turned out alright!
Finally, the little black cat. I added a muzzle using grey, then added a nose and mouth. Obviously he needed some ears and a tail, so my Models Own nail art pen came in handy again. Once I was happy with every single Halloween face, I topped the manicure off with Essie 'Good To Go', which smoothed everything out, albeit highlighting a couple of errors that needed rectifying!

What do you think? This is definitely my favourite Halloween design so far, and I'm glad I managed to find a few hours to spend doing a detailed manicure. Who's your favourite? I have a very soft spot for Frankenstein's monster, but I think the pumpkin turned out best of all! That always seems to happen with thumb nails, I suppose it's because it offers a slightly bigger canvas... Make sure you check out the rest of the Polish Party girls' Halloween manicures, they're all fantastic!

Halloween Nail Art: Black Cat Silhouettes

Hi guys. Yep, you guessed it, I've got another Halloween manicure to share with you today - black cats! I've been desperate to use the Rococo polish that my friend very kindly gave to me a few weeks ago, so this was the perfect opportunity. It's a gorgeous dusky lavender colour, and I knew it would look really effective along with simple black silhouettes.

The equipment:

Rococo 'Lady Lavender'
Models Own black nail art pen
Essie 'Matte About You'

The Rococo polish is of such high quality, it only took one coat to achieve an amazing finish. It applied really smoothly, the brush is just the right width and shape, and the consistency is perfect - not too runny and not too gloopy either! I'm not sure how much the polishes normally retail for (I imagine they're pretty £££), but I definitely won't hesitate to treat myself in the future.
Once my purple bases were dry, I used a black nail art pen to draw on the silhouettes. I found some pictures on Google images and half copied, half made up my own cat shapes. I decided to have two sitting cats on my index and ring fingernails, and a scaredy-cat (I think that's what they look like?!) on my other three nails. 
A shiny finish really didn't look right, so I added Essie 'Matte About You'. I think it's make a world of difference! What do you think? What are your nails sporting this Halloween?

Halloween Nail Art: Crazy Pumpkins

Hi! Today I've got another Halloween manicure to show you... Pumpkins! This design was really quick to do and I love the contrast of colours. I'm not a big fan of orange (it tends to clash with my ginger hair!), but it is definitely one of the most Halloween-y colours. I tried to make each pumpkin's expression a bit different for some variety, and also added glitter to make the manicure more girlie.

The equipment:

e.l.f. Cosmetics 'Mango Madness'
Fearne 'Burnt Out'
Sinful Colors 'Pistache'
No. 7 'Totally Teal'
Models Own black nail art pen
Fine nail art paintbrush

I use 'Mango Madness' for a base, which is one of my favourite colours from my prize for winning the e.l.f. Cosmetics nail art contest a few months ago. I've seen some negative feedback about the quality of e.l.f.'s polishes, but for the price, I think they're a really good budget option. There's a huge variety of colours, and though it takes about three coats for opacity, the finish is always very smooth and shiny. Once my bases were dry, I used Fearne 'Burnt Out' with a fine nail art brush to add sparkly lines.
Next, I used 'Pistache' to paint a small semicircle on the top of each pumpkin. Then I added some more lines using 'Totally Teal'. For the pumpkin faces I used a black nail art pen. I didn't worry too much about neatness, because I always think carved pumpkins look best when they're quite jagged and weird-looking!
 

Then and Now: Pumpkins + Tutorial

Hey everyone! Today's tutorial design is pumpkins, probably the most famous halloween food there is. Although, I'm about to making a shocking confession: I have never actually eaten pumpkin, dun dun dunnnn. The smell puts me off way too much, but every autumn I hear people raving about how good pumpkin is, yet I'm still not quite tempted to try it. Nevertheless, I can enjoy it on my nails, and it's such a simple design to complete so I'm sure you can all enjoy it too! The 'then' nails and the tutorial will be after the jump


For these nails I used a base of OPI - My Vampire Is Buff, then I used Barry M - Satsuma, Barry M - Mushroom, Barry M - Key Lime, and Seche Vite topcoat 


This is what they looked like last year:


And now for the tutorial...

Step 1: Paint your nails with a basecoat of OPI - My Vampire Is Buff, you could also use white if you’d prefer
Step 2: Using the brush from the bottle of nail varnish or a separate brush, draw a semi-circle of orange
Step 3: Using a thin brush or striper, paint a lighter shade of orange (perhaps by mixing a bit of white with the orange as I did) in stripes to create a more pumpkin-like effect
Step 4: Using a brush paint a stem for the pumpkin using Barry M – Mushroom
Step 5: With the same thin brush, paint a spiral of green. I used Barry M – Key Lime
Step 6: Finish off with a topcoat to seal in your design and you’re done!

What do you think? Let me know in the comments!
Alice

Halloween Nail Art: Sparkles & Spiders

Hi everyone, long time no see! I've been the WORST blogger recently, I don't even dare look at the date of my last post. Oooops. I've been working a lot recently so my nails have taken a back seat, and all of the keyboard bashing has turned them into sad little stumps! Anyway, I decided to reenter the world of nail art with a spider design. I've had several different ideas for Halloween, so I'll probably end up doing quite a few posts. I decided to start off with spiders and cobwebs, since I knew it'd be nice and simple, which is probably best as I'm seriously out of practise!

The equipment:

Rimmel 'Pompous'
Sinful Colors 'Out Of This World'
Models Own white nail art pen
Models Own black nail art pen

I used purple 'Pompous' and silver 'Out Of This World' for the alternating bases. Both are really lovely metallic shades with subtle glitter throughout. The silver required three coats for opacity, and the purple needed two.
Once my bases were dry, I used my nail art pens for the details. I drew black cobwebs on the corners of my silver nails, then formed a little spider with a blob and six skinny legs. I also added eyes with tiny dots. On my purple nails, I painted the cobwebs in white for a bit of contrast. They looked a little bit boring compared to my other nails, so I decided to add some baby spiders on top.
This manicure required hardly any equipment, and although it's not my best, I still think the idea is quite effective. I'm very much in a Halloween-y mood now, so watch out for a few more 'scary' designs. 


Tutorial Tuesday: Models Own Velvet Ghosts

Hey everyone! As promised, today I have one of my 4 halloween tutorials to show you. This design was intended to be a bit different, as I originally intended to have orange ghosts and white ghosts and look a bit like this, but I unfortunately put the white ghosts too close together to be able to fit the orange in as well. However, I like the look of it nonetheless and I thought I'd create a tutorial to go alongside it. The tutorial will be after the jump otherwise the post may end up a bit too long


The base of these nails is the gorgeous Models Own - Absinthe*, from the recent Velvet Goth collection. As you can see, this can be worn either on its own, where it dries matte, or with topcoat (as on the design above) and both look equally as awesome. This was an easy 2 coats. In the pictures it looks slightly textured but it's actually really smooth (although not quite like velvet), which I'm glad about as textured polishes tend to get a bit irritating after a day or so. 


And now for the tutorial, as I'm sure it's the reason most of you are here!


Step 1: Paint your nails with a base colour, of course it doesn't have to be in any way similar to mine, just as long as the white still stands out
Step 2: Paint 'n' shapes on your nails using a tiny detailing brush to mark out where you want your ghosts to go
Step 3: Fill in the shapes and draw the bottom of the ghost with the same detailing brush
Step 4: Again using the brush, paint black dots for the eyes
Step 5: Fill in the centre of the eyes with white (optional) using the detailing brush in a lighter way
Step 6: Finish off with a topcoat of Seche Vite to seal in your design and you're done!

What do you think?
Let me know in the comments!
Alice

Witch Owls

Hey everyone! As halloween is starting to creep up on us a bit (see what I did there?) I thought it was time to start bringing the halloween nails around. I have 5 designs for you this year, 4 of which are tutorials so I'll be doing tutorial tuesday and tutorial thursday this week, hopefully you wont mind too much. So I'm starting my halloween nails off with these cute witch owls. These were meant to be a tutorial but they ended up a bit too long-winded so I thought I'd just keep them as a simple nail design. I got this idea from Little Miss Nail Polish, you can see her design here.


To do these I started with a base coat of OPI - Nail Envy*, followed by 2 coats of OPI - Purple-iscious*, then I painted a circle of Layla - Marshmallow Twinkle using a small brush. Once that was dry I used Alessandro - Midnight Black and a small nail brush to paint on the hat, hair and broom, and then I used MASH - White for the eyes, to finish the design off I used a bit more of Marshmallow Twinkle on the broom, and I topped the design off with a coat of my trusty Seche Vite.


Here's a shot of the gorgeous Purple-iscious alone, I absolutely love this colour. It's so unique and there's so much going on that is just impossible to capture on camera. It shows up a lot more on the bottle in the pictures than it does on the nails unfortunately. The duo of Purple-iscious and Nail Envy has been specially designed for QVC to celebrate their 20th Anniversary this year and I think they chose an awesome colour to celebrate with, don't you?


What do you think? Let me know in the comments!
Alice