I'm back!! My new computer arrived Saturday, and I spent the weekend getting it set up. The actual setup was easy and took minutes, but the little details of everyday use are a bit harder. You don't realize all the little things (like font, text size, saved passwords, desktop icons) about your computer you take for granted until they look almost right but are just wrong enough to really bug you. I'm still working on getting those little things fixed, but it feels so great to be back!! :)
Being back means I have some nail art to catch up on — like ABC Challenge posts. The challenge is coming to an end this Wednesday, and I still haven't posted my X mani.
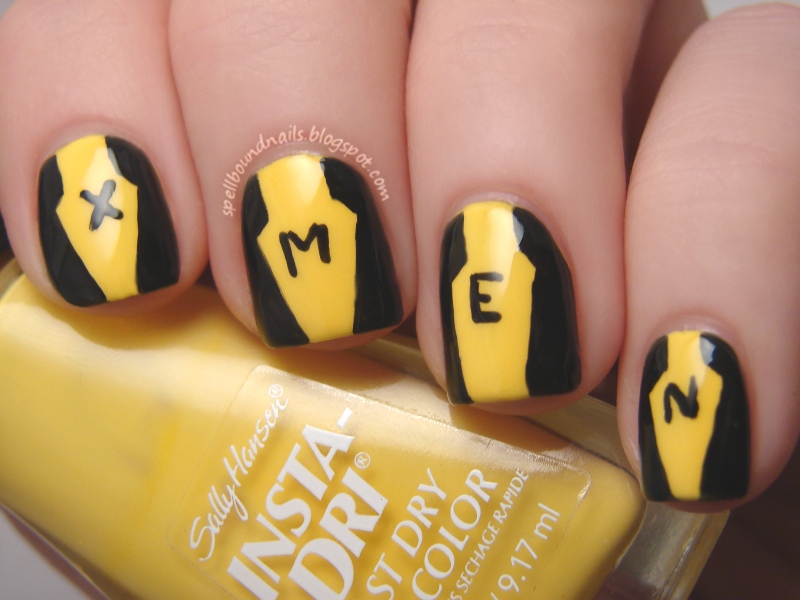
X is for ... X-Men.
I knew immediately I wanted to use X-Men for X. I just wasn't exactly sure what kind of design I wanted to do for X-Men. I went searching and found the X-Men: First Class comics ... and the uniforms.
The uniforms were weird enough to catch my eye; bright yellow and black create an interesting contrast. I'm oddly reminded of Bumblebee from Transformers. The First Class uniforms have an odd black circle around the bellybutton area that has a yellow X cut straight through that I replaced on the chest area (or at least what I imagine is the chest area) with simple black letters to spell XMEN.
The hosts of the ABC Challenge have decided to start a new challenge once this one is over. It will be Inspired by Time Periods so be sure to check out the group if you'd like to join. It will certainly be challenging! :)
Also, what do you guys think of the new St. Patrick's Day layout? I went to change the header and buttons to something more festive like always and everything went wonky! I had to rearrange and recode almost everything. I think it looks much better though, neater and more organized ... at least for me. How's it look for everyone else? No overflow or anything weird like that?
The only polish from this collection inspired by a character and not a location. Lollipop Princess was inspired by Princess Lolly, resident of the Lollipop Woods and princess of Candyland.
Update: This polish and the rest of the collection are now up for sale in my Etsy shop.
Lollipop Princess has pink, purple, and yellow hex glitters. And, since every princess needs some bling, small purple holo glitters.
I'm going to have to try to get some better pictures. The colors are slightly off in this close-up and in the bottle picture.
Lollipop Princess over Wet n Wild I Need A Refresh-Mint.
In an effort to really showcase the holographic glitter I layered one coat of Lollipop Princess over Revlon Enchanting with a black accent nail. I think I caught the holo at just the right angle and light to make it flare. Mostly I caught the bright blue flares but it also turns a white/purple and a bright pink. You can see one small flash of pink on my pinky nail.
I have been dying to see this glitter matte since I first mixed it up so I decided to add a layer of NYC Matte Me Crazy. Wow! I don't ever want to take this off!!!
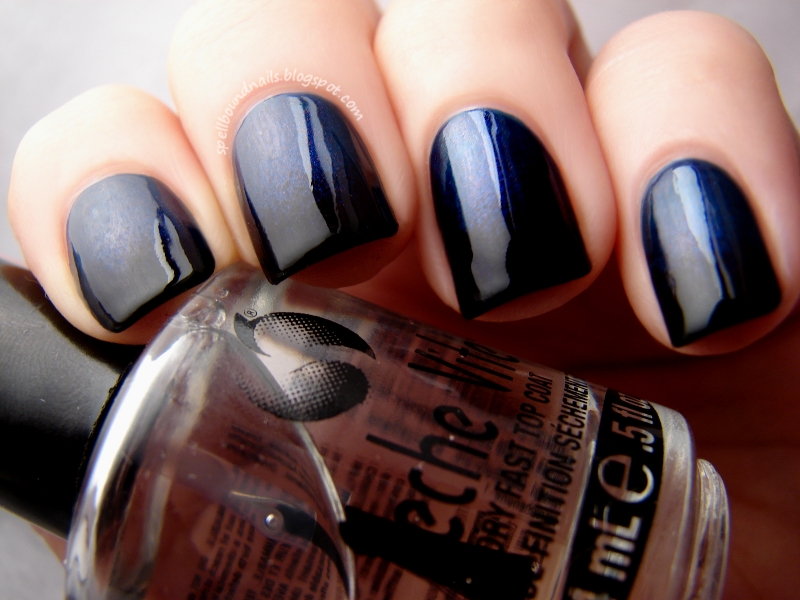
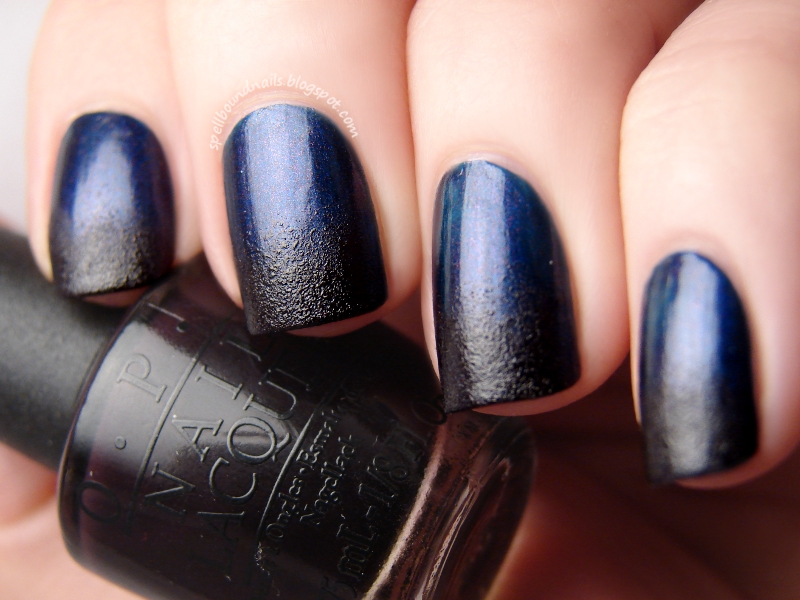
Welcome to my gradient fail. This isn't a full fail, but under any light except very direct sunlight and my lightbox these colors are just too dark to show the gorgeous fade between them.
Even with my lightbox I had a very hard time capturing this gradient. I used two polishes from the OPI Best of the Best mini collection. I got this collection as a gift Christmas 2011, and I love it to pieces.
The first polish I used, and the base of my gradient, is Russian Navy. Wow! I can see why this was one of the Best of the Best. Originally from the OPI Russian Collection, Russian Navy is now an OPI Classic shade. From the outside, Russian Navy looks purple. However, once you untwist that cap you're in for a shock! This polish is a deep indigo blue and all that purple you saw from the outside fades into a subtle shimmer.
Next, I used Lincoln Park After Dark, originally from the Chicago Collection. Alone this polish is a very deep, dark purple, but turned black when layered over Russian Navy. I was hoping once I got it sponged on and added a top coat that the beauty of this purple would shine through but I couldn't get a hint of purple on my nails no matter the light I put it under ... though some of the purple color did show in the bottle.
Lastly, I added a small amount of black to the very tips, reminiscent of a French tip.
One coat of Seche Vite Dry Fast Top Coat sealed the colors together and gave my nails an amazing amount of shine. This is my very first bottle of Seche Vite, bought and paid for with a free gift card I earned with my Swagbucks account. Sign up for an account of your own and use the code JANTASTIC (before 11:59 PT tonight) and you'll start with 100 Swag Bucks. Hint: A $5 Amazon gift card is 450 Swag Bucks.
So, overall, if I was going to walk around with my hands in a lightbox this would be a perfect gradient. I don't think that idea would work very well though and, sadly, neither does this mani anywhere except these pictures. :(
Hello everyone!! Since Halloween is my favorite holiday I decided to make October the best month yet. Or at least, I hope you guys will like my posts. What do you have to look forward to?
My usual Wednesday posts have been taken over by the ABC Challenge nail art so you should be seeing some pretty creative designs coming from that. I try to think outside the box with every letter.
I've also decided to take part in the Nail-Aween Nail Art Challenge. There are some really great designs, some I haven't tried before, that are part of this challenge. It's going to be awesome!
What does all this mean for you? More posts!!! What does this mean for me? A really busy month. :)
The first design asked for in the Nail-Aween Challenge is water marble. I really dislike water marble. Don't get me wrong. The look of a finished water marble is really pretty (if you don't look too closely) but the time it takes is really not worth it, in my opinion. With this in mind, I debated doing a pin drag mani instead and calling it a 'without water-water marble', but I just couldn't do it. It would have felt like cheating.
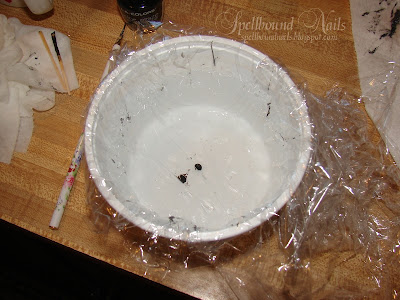
Water Marble is actually pretty simple, but it is also very time consuming. You start out by painting your nails with a base color. I used white. Next, you need a bowl of water. This water has to be filtered or bottled and it must be room temperature. I filled an old butter dish with bottled water and left it sit out overnight. By the time I was ready to start, it was the perfect temperature. What wasn't perfect was thinking I could use a butter dish. The inside was too glossy and the polish wouldn't attach to the sides. You think this would be a good thing but you need to stabilize the outer edge of your polish rings before you can start swirling designs. I finally managed to rig up this. I lined the butter dish with saran wrap and poured the water back in. The saran wrap held the polish perfectly and I had no problems creating swirls.
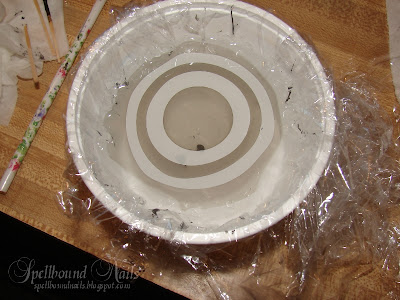
After you set up your water, make sure you have all your supplies on hand. You want to be able to move from one step to the next without having to leave your work space. Work one finger at a time. Tape around your nail but don't get too close. Taping too close to the nail may stop the polish in the water from settling correctly. It's easier to clean up than to start all over. Once your nail is taped, start dropping your polish into your dish one drop at a time. Be careful not to overload the brush with polish. You only need one drop and an overload brush may drop two or three before you can control it. Keep dropping polish into the water until you get a tight bulls-eye pattern. If your polish isn't spreading you can give the dish a few quick taps against the side. Don't do this too harshly or you'll make a mess by splashing water and polish or create bubbles in your bulls-eye. How do I know? I did both.
Once you decide you have enough rings you'll need to attach them to your dish if they aren't already attached. Don't touch the outer ring! This ring will already be dry and touching it can ruin everything! Work from at least two rings in just to be safe. To create your swirls you can use almost anything sharp: a pin, a toothpick, the sharp end of a pencil (just know that the graphite may cause discoloration in the polish). I used an old nail art brush and found this worked even better than my attempts with a pin or a toothpick. You'll need to keep a napkin or paper towel on hand to keep your sharp object clean as you create swirls. Creating the swirls is up to you. Jump right in or spend a few moments trying to plan them out.
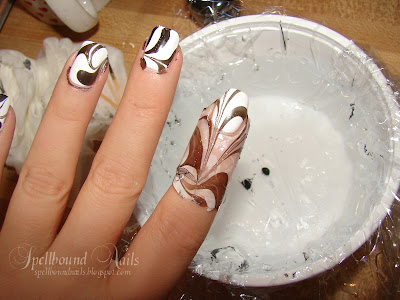
Find a swirl you like and carefully sink your finger (nail down) through the polish and into the water. Keep your finger in the water! You need to clean the water of polish first or you'll ruin your design. I used my nail art brush and rolled it through my fingers while I moved it around the water. This rolling motion will gather the polish better than simply swishing it through the water. Rolling will literally roll the polish around the tip of your brush (or pin/toothpick/pencil). This is what you'll need your napkin for. Carefully remove your finger from the water. Don't blow on your nail or flail your hand through the air. Remove the tape around your nail. Carefully! You don't want to bump your nail and you also need to be aware that you'll be flinging water everywhere because there is certainly water caught in and around the tape. After that, pull your brush through the napkin/paper towel and move onto your other nails, repeating the process again and again. :)
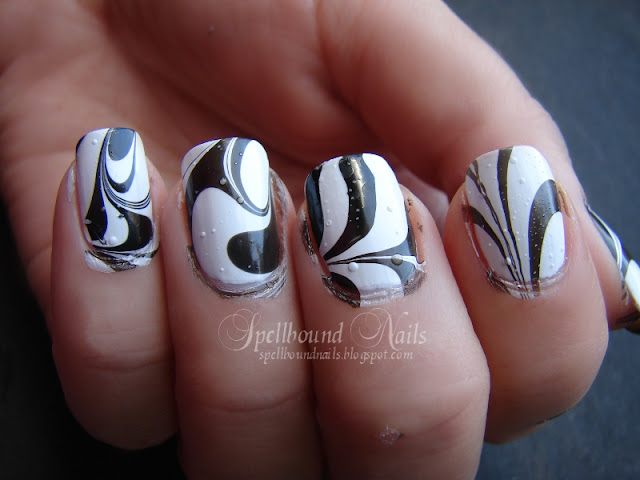
You'll come out with something like this and you'll quickly realize a few other reasons I dislike water marbling besides it being time consuming and a waste of polish. The first thing you'll notice are the bubbles you'll surly have. I'm sure more seasoned water marblers have learned tricks on how to prevent this, but I've found nothing I tried so far worked. Some things I tried made it bubble less and other just caused more bubbles. The other big reason? Polish has settled everywhere that wasn't taped. This means there is polish all over my cuticle and worse still, settled around my nail and under it too! No amount of cleaning will fix all of this. Some will be cleaned and the rest will flake off in a day or so, usually with a little help from some tweezers.
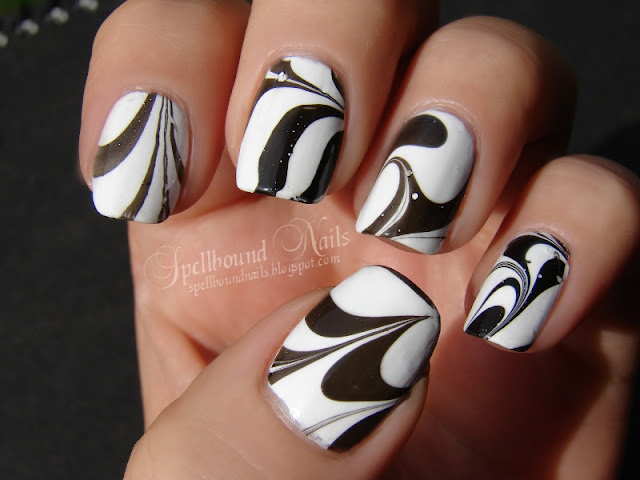
You can see here that I cleaned them as best I could. I also added a layer of top coat. This top coat swiped the bubbles right off and left behind blank spots in the black and dents in the white. While I feel really accomplished for doing this for the Nail-Aween Challenge, and I love the swirls on my pinky and my thumb nails I think this is nail art best viewed from further away ... or just not done at all.
What do you think of water marbling? Have you mastered this art? Or, like me, do you find it a waste of time and polish?









.jpeg)


