

Hello Kitty Tutorial
It's time for my second tutorial on I Heart Nail Art, and I thought it would be fun to pay homage to one of my favorite felines, Hello Kitty!When I decided to learn how to make a Hello kitty design I looked up some tutorials on YouTube, but didn't really see what I was looking for. A lot of the designs were hello kitty's entire body, or were complicated Acrylic work. Not my style. I wanted to focus on Hello Kitty's iconic face. Cutepolish has a gorgeous tutorial, but I didn't like that the design didn't feature Hello Kitty's ears. So finally I decided to just pick one of my many Hello Kitty related items, and toy around with my nail wheels until I got the look I wanted. I chose a french style, to keep it a bit simple, and I put the focus on her ears and famous bow, because that is what stands out to me when I think of Hello Kitty.
The Hello Kitty design and brand is owned by Sanrio, I take no ownership. I am just a huge Hello Kitty fan creating some fan art.


For this design you will need:
1.A dotting tool or tooth pick.
2.A detail nail art brush.
3. Polishes for the base, eyes, nose, and bow.
(I chose the classic hello kitty colors, -red, yellow, and black.- but that doesn't mean you have to. At the end of this tutorial I'll show you a version I did using a mint polish.)


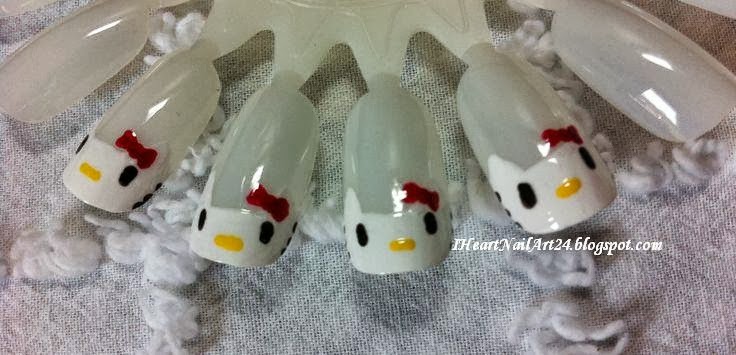
I used my detailing brush to paint two triangles on both sides of the nail plate using the same white polish. Be sure to blend the bottom of your triangles into your french tips. Any noticeable edges will blend in once the top coat is applied.

Next is Hello Kitty's eyes! For this you can use your detail brush, but I like to use my dotting tool - or toothpick- for more precision. I used NYC Black Lace Creme and a small dotting tool to create two ovals on the inner corner of each ear.


Next I used Butter London Cheeky Chops and, again, my small dotting tool for precision, and painted a thick line between the eyes for her nose.

Lastly, it's time for Hello Kitty's iconic bow. Bow's can seem tricky, -I plan on making a more in depth tutorial soon.- but all you need to do is use a large dotting tool, or apply a lot of polish onto your toothpick, and place a dot on the corner of her ear. Next take a detail brush or small dotting tool and create two triangles on both sides, then just fill them in. Again, I will make a tutorial soon with pictures to better explain this technique. For my bow I used Milani Rapid Cherry.
 |
| After a coat of Sally Hansen Double Duty Topcoat. |

Like I mentioned, you don't have to keep with the classic Hello Kitty look. This design I made a long time ago features my favorite shade of Mint, Sally Hansen Mint Sorbet. I also placed her face on every other nail, and placed a large mint bow on the blank nails, to balance the look, and to keep it on the simple side, since I rarely like bold designs on every finger.
Thanks for reading!
If you try out this design I would love to see it! You can tweet me a picture on Twitter, my link is in the Places to Find Me section on the left.
(To check out my other nail art tutorials, click here.)

Are you a Hello Kitty fan? Let me know in the comments.

Share story


0 comments: